|
Building a ship diorama “Seas of Hard Knox” Catching the eye with dramatic, realistic seas and a great model |
|
|
By Rusty White, #20181 |
|
) The completed WEM Knox navigating the high seas. |
|
|
Click Image to see full-size photo |
|
|
Plain and simple I really enjoy building modern naval vessels. The problem is some of them just aren’t very interesting when put beside the other ships in their category. Unlike the Fletcher and Adams class destroyers, the Knox frigate isn’t as appealing to the eye. One thing I have learned over the years competing at the Nationals was to catch the judge’s eye with my entries. Since a distinctive color scheme or unusual fit wasn’t possible, I decided to add a really cool looking water base. This presents a problem. In the past, I have done similar bases on my ship models only to hear “man, that’s really good water”. Since this was probably going to happen again, I had to figure out a way to use both to my advantage. The obvious choice was to enter the model in the ship diorama category. I asked a friend who served on one of these ships how stable they were in high seas and he regaled me with story after story about how the tiny ships were battered about the waves. Apparently, it wasn’t unusual for the ships to literally have their bows exposed to the point where the sonar dome was visible in really high seas. The model The model I had was a wonderful 1/350 scale multi-media kit from White Ensign Models of the USS Knox. WEM makes some of the finest and best fitting model kits in the world, so assembly went smooth with no problems. I assembled the model with the full hull option since a good portion of it would be visible. Since this was going to be a diorama, I really wanted to show action in the boiling ocean so I sanded off about Ľ inch of the hull at the stern on one side with a belt sander. Not only to point the bow out of the water, but to make the ship “list” to the right (starboard) to further enhance the look and action of the modeled sea. The kit was assembled, painted, decaled almost complete excluding the photo-etch. The high seas So now I had a plan to pursue. If I was going to the trouble to really make some extreme water, I was going to make some EXTREME water. I decided to go with 30-foot waves, which weren’t uncommon off the Vietnamese coast. I use a product I get at Hobby Lobby called Sculpey to make the waves. Sculpey is modeling clay that when heated in an oven, turns rock hard. Since the base had to first be heated, the waves would need to be done before placing the model. For this project, I used Ceramic Sculpey, which hardens to a ceramic (duh) hardness. The advantage to using the more expensive Sculpey was that the waves were going to be rather thin to show high winds. I first drew an outline of the hull on the base so I would have some point of reference when sculpting the waves. To enhance the “list” to one side, I added a piece of Basswood to the base. It was then matter of sculpting the waves around the line to a realistic looking appearance. It wasn’t necessary to create a perfect fitting hole. This would be corrected later. A very important feature of the diorama was the massive “splash” of the sonar dome as the weight of the vessel forced it into the oncoming wave. I formed the splash with very thin Ceramic Sculpey. To give the wave a more realistic broken appearance, I mixed cotton with the gel and added it to the leading edge of the splash. It resulted in a very realistic look. Once the gel was added, it looked seamless. |
|
|
Ready for the oven! Note the Basswood in the center. The different colors of Sculpey represent ceramic and regular. |
|
|
From dry-dock to sea Now that the base had cooled, I could set the model into the water. Using Artist’s Gel Medium from Liquitex, I put plenty in the hole and around the edges to permanently set the model to the base. Gel Medium can be found at most arts and crafts stores and is indispensable when making water. By putting lots of Gel Medium in the hole, the extra would squeeze out the gaps where the waves didn’t create a perfect fit. It was then a matter of blending the gaps into the waves using a flat head brush. The rest of the base was then covered with a generous coat of Gel Medium to give the wood and Sculpey the same texture. Exposing the Sculpey to high temperatures of the household oven sometimes causes cracks to form in the thicker parts of the waves. The Gel Medium hides cracks, fingerprints, and other blemishes. The model was set aside to dry for at least 24 hours. The gel medium has the consistency of mayonnaise and dries perfectly clear. Even if the gel isn’t completely dry, you can still proceed with painting as long as it is dry to the touch. It will continue to dry after painting. |
|
|
The massive “splash” under the sonar dome was a very important part of the diorama that had to look realistic. |
|
| I then applied the white water streaking down the sides of the hull by dry brushing Titanium White acrylic right from the tube. I wanted to portray high winds coming at the Knox, so I streaked the water at an angle running down the sides of the hull. This is a tricky technique, and you only get one try at it. The most important thing to remember is to streak the paint the SAME angle on all sides of the hull. Remember, gravity will draw the water down the sides of the hull. So dry brush the water accordingly. | |
|
Notice how the white water runs a different direction than the rust stains. Make certain the water streaks run at the same angle on all sides of the hull. |
|
| The rust streaks were added using chalk pastels before the model was put in the water. Remember that the rust runs down the side of the ship in relation to it sitting horizontally in the water. So the rust streaks will be at a different angle than the white water streaks. | |
|
|
|
|
Now that the model is securely attached to the base via the Gel Medium, I was now ready to begin final assembly. I attached the upper mast structure sub-assembly and applied the radars. Building everything in sub-assemblies is way easier than doing the job piece by piece on the model. This also allows assembly to continue while the Gel is drying. |
|
|
The mast structure includes 19 separate photo-etched parts, and is much easier to deal with as a sub-assembly. |
|
|
I always wait until the model is secured to the base before
adding the photo etched rails, ladders, and other parts. I can now safely
handle the model via the base, keeping my fingers away from the super
delicate photo-etched parts. This was especially important where White
Ensign Models kits are concerned. This company in particular, produces
the finest, most delicate, rails I have EVER worked with. While they look
extremely nice once on the model, bending and test fitting the rails is
virtually impossible due to their fragility. Once all the photo-etch was
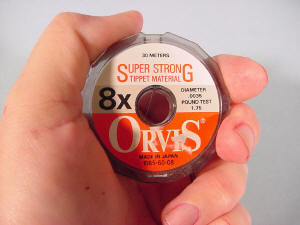
applied, I added the guns, lifeboats, and ASROC launcher. Rigging Rigging due its fragile nature, is always the last chore to deal with on ship models. It is also one of the most mysterious techniques involved in ship modeling. Why I don’t know, but here’s how I do it. I use Tippet line to rig all my ship models. Tippet line is what fly fishermen use to tie custom made flies. The advantage to using this line is that it comes in various extremely thin diameters, which makes it perfect for rigging ship models. I picked mine up at a local tackle shop. |
|
|
Perfect for rigging ship models, Tippet line comes in various diameters and can be found at most sporting goods stores. |
|
|
Measuring up Measuring rigging can be a tricky proposition at best using a scale, so I use draftsman’s dividers. Dividers are the “V” shaped instrument most people see in the nautical movies when the navigator is measuring vast distances on the charts. They can be found at architectural supply houses and have a multitude of uses as a measuring device. Dividers work equally well for modelers when measuring distances in areas where a scale dares not go. Tippet line comes on a roll. So it comes off the roll in a spiral shape, which is difficult to work with for rigging models. To straighten out the line, wrap the end around a pencil and play out a foot or so of the line. Then gently stretch the line until almost the breaking point and hold for a few seconds. Now the line will lie out almost straight and ready to cut. The next step is to anchor the line at the highest point with a drop of extra thick super glue or Elmer’s white glue. Using very fine tweezers just lay the end of the line where it will go. The tweezers I use have pinpoint tips, allowing the modeler to pick up the finest and smallest of parts. They can be found at electronic stores, and better hobby shops. |
|
) Step 1. Measure with dividers |
) Step2. Transfer measurement to line and cut. |
|
Rigging ship models Gravity will do the rest while you wait for the glue to set. Once the glue sets, repeat the process at the attachment point at the base of the line. The line will still have some slack in it. Once the glue dries thoroughly at both ends, use a heat source, (a blown out match is perfect for this) and carefully move it close to the line. The line will then tighten up when it meets the heats source and you’re ready to proceed to the next line. BE CAREFUL! If you get the heat source too close to the tippet line, it will melt through. Repeat this process on all the lines. The final step to rigging is to paint the lines with a very thin coat of gray. |
|
|
A blown out match produces just enough heat to tighten the delicate Tippet line. |
|
|
Painting the water Making the water look real is absolutely essential in diorama competition. So sculpting realistic water was only half the battle. If it weren’t painted realistically, all that work would have been wasted. I went to the Internet and found a number of photos of ships in high seas to use for reference and went to work. A good base coat is essential for this project because the color dominates most of the diorama base. So I mixed some sea blue using Liquitex Phthalocynine Blue, Phthalocynine Green, and Titanium White. Working from dark to light colors; I painted the water with my base coat after masking the exposed wood edges. To simulate air being mixed into the water by the wind and ship, I added some Titanium White to the base coat and applied and blended into the tops of the waves and around the hull of the ship where it met the water. To break up the surface more I dry-brushed the same color over much of the water. This work out very well because the dry brushing highlighted Gel Medium nicely broke up the monochromatic blue surface. The last step in the process was to add the final tiny details like whip antennas, signal flags (to add the feeling of the wind) and the American flag atop the mast. Two heavy coats of future Floor Wax made the water super shiny and appear just like real water frozen in a moment in time. I am very happy with this project. The high seas depicted did just what I was hoping it would. The water transferred an otherwise ordinary model into a real eye catcher. |
|
) Look closely and you can see the lighter shade on the water. |
) The white water was the last color added. |
|
Reference photos are invaluable to create a realistic looking water surface. The white water really brings the diorama to life. |
|
|
Information, images, and all
other items placed electronically on this site |
|
)
)
)
)
)
)