|
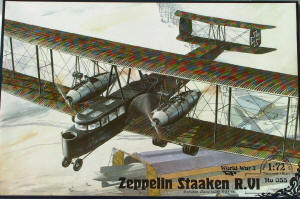
Roden Kit Number 055 1/72 Zeppelin staaken R.VI 27/16 |
|
First Look By John Ratzenberger, #40196 |
|
|
|
MSRP: $100.00 USD Background: I'm not sure what possessed me to buy this -- my modeling has been confined to British and US subjects for years, with emphasis on the British. This is my first German aircraft since the very first Monogram Ju-87, I think -- anyway, a very long time. The modeling issue is that I'm used to simple color schemes -- for WW1, why would anyone need anything other than PC-10 & CDL? So I have no clue what to do with big sheets of lozenge decals, this impacts my usual assembly and rigging practices. I guess I knew about these aircraft generally, but not enough in detail to appreciate them for their technical merit. The German R-Planes were designed as strategic bombers to overcome the limitations of the Gotha type bomber. Power and reliability were addressed by four engines, two per nacelle with a mechanic sitting between them to make in-flight repairs. The R-series spanned about 42 meters, with a length of 22 meters, and height of over 6 meters. They crawled about 85-90 mph but could get to 4000 meters. They could handle a whopping 1000kg bomb, but most often carried some combination of smaller bombs up to 1600kg. They were big, robust, well armed, and none were lost to enemy action. The R-planes dropped about one-third the total tonnage that ten times the Gothas did, and lots more Gothas were lost. The sources at the end of this review give great information on these aircraft. As I read them, I could not help but think -- these things came only a dozen or so years after the First Flight !!!! Opening the Box: The sturdy, top-opening box is about 17" x 12" x 4" deep. The parts aren't cramped inside and come packed in two large plastic bags. They are stacked neatly in the bags and the bags fit closely so there is little chance of breakage. The clear parts are separately bagged and inside one of the larger bags. The decals are also bagged. There is a 12-page instruction booklet. Page one is the obligatory, but very well done, multi-language history of the airplane. Pages two and three have the parts diagrams, Humbrol colors, and usual warnings & icon explanations. The parts diagrams have grayed-out, do-not-use parts suggesting variants to come. Some of these parts are present; others are not -- more on this later. Pages four through ten are the construction steps; page eleven is a drawing of the completed model, and page twelve is a partial rigging diagram -- you are referred to the box art for more details. The instructions seem logical - the first construction page creates dozens of sub-assemblies and the following pages turn those into bigger sub-assemblies until it is finished. The painting instructions are on each step and are detailed to the part level. I counted 464 useable parts, measured the wing span around 23", and the fuselage length around 12". For comparison, the Airfix Lancaster has a span of about 17" and a length of about 11". The first three sprues (A, B, C) are the lower wings, upper wings, and main fuselage. The wings are solid and thin -- not more than about 5/64". The upper wing comes in a left & right half with a small tongue and groove to help hold them together. The lower wings have a similar tongue & groove attachment to the fuselage. These parts have a rough finish simulating wood or fabric -- I'm really not sure how well that will show up under the decals or if the finish will make the decals harder to smooth down. At first I thought the rear fuselage to be very roughly molded, then I realized this was a very nifty representation of the fabric sagging slightly between the fuselage formers. |
|
|
|
|
|
The clear sprue (H) has all the grayed out parts, but you'll only use 6 of
the 25 parts for this kit. The next sprue (G1) has the floor, tail assembly, and myriad other parts. Unfortunately none of the grayed-out parts on this sprue are present. |
|
|
| There are two each of sprue F1 holding struts, nacelles, and other details. Unfortunately about half the grayed out parts are not present. |
|
|
| There are four each of sprue E1 -- the engines, bombs, guns, etc. All the grayed out parts are present. There are four engines, each with 23 parts -- to include 6 individual exhaust stacks for each engine -- and the stacks face up so you'll just have to drill 'em out !!! |
|
|
| There are three 9" x 13" sheets of lozenge decals, three pages of cutting templates for same, and a sheet of national insignia. There is also a two-view color drawing of the aircraft to show placement of the national insignia. |
|
|
|
|
|
I laid the larger parts over the 1/72 drawings in the Windsock Datafile
and see no big problems. The ribs, formers, and etc all seem to match
up. I do note that the drawings indicate a slight back-stagger of the
main wings, but Roden makes no mention of this and has no side alignment
diagram -- for now, I'll assume the strut positions handle this. The quality of the parts is, to me, typical Roden - very good, very detailed, very small, very delicate -- very easy to break or loose. I have learned to use a warmed up single-edge razor to get small parts off the sprue to minimize undue stress on the parts. There are very few seams on the small parts -- the molds appear to have been well aligned. I found a single sink mark -- on the radio. The wings have a few swirls and marks on them, but I do not think these will be noticed under the decals. The outline of two injector pins inside one fuselage half are visible from the outside but again, I do not think this will be noticed under the decals. There is good detail in the kit -- the cockpit looks nice, and the engines/nacelles have appropriate cooling lines, but not the fuel lines to/from the center section. As noted above -- it also means small & delicate. The landing gear looks rickety -- it will be interesting to see if it can hold the weight. Roden has addressed the model size, weight, and sturdiness issue by providing various ground supports and ladders as seen in period photos to take the weight from the wings and hold the rear fuselage up so the beast also sits on its nose wheel. That should spread the load around. This is a good touch and enables a decent diorama with a few figures and things. Heartburn: OK, one really should not buy this kit unless one has some pretty good skills in the big WW1 airplane field. But that doesn't mean that Roden shouldn't provide some direction on how to approach the assembly, decaling, and rigging sequence. They say virtually nothing and it is up to the modeler to study the sequence and decide when to apply decals, when to assemble, when to rig. There is no guidance about rigging size. I have determined, from the sources below, that many of the wires were doubled but these and the turnbuckles were encased in canvas sleeves. Right now, I have decided to overlay the templates over the wings, tail, etc, and mark where struts, etc will go. Then once decaled, I can overlay that template again to find where to poke through the lozenge so I'm not blindly stabbing at it. I have also decided that my usual fishing line & holes with a dab of touch-up paint probably isn't going to work and so I'll use steel wire, cut to fit. With so much decaling, I'd hate to think there would be a problem with them, so I think a test is in order, and then start building with the decaling of the flying surfaces. Hopefully any problems can be covered with patches from the scrap. I'd hate to spend a whole bunch of time on the details (and 23 parts per engine) only to have the decals fall apart... Possible Variant Releases: The grayed out parts indicate they may release two other aircraft -- R.30/16 and R.52/17. Both used the Maybach engine that is included on sprue E1 with the Mercedes engines for R.27/16; unfortunately the props are not included on F1. Both of these will probably have different templates for the lozenge decals -- in fact may have more decals, I see that R.30/16 had lozenge on the full fuselage. R.30/16 had the first supercharging system -- a fifth engine in the fuselage that pumped compressed air to the normal four engines. The air ducts, radiators, etc are present on sprue F1 but the fuselage mods are not on G1. R.30/16 also had upper wing gun platforms. Some of the parts are on F1, but not the gun positions. I don't know all the parts/changes but I do see the center fin is not included. One could, with references and some work, build R.30/16 from this kit. I suppose when the variant is released there will be a different right fuselage as well as new upper wing sections. R.52/17 was a very late production and had a different nose -- an open cockpit sat atop the fuselage -- this variant will need new fuselage halves. All the glass for R.52/17 is included with this kit. I haven't made an effort to see what other changes might be required. Summary: I am still not sure why I bought this thing - it may just have been the sheer scope of the project. I am glad I did because the research has been enlightening. I think "I recommend this kit" is somewhat meaningless -- it is obviously a niche kit for advanced modelers; if you are one of these, then I see no reason, at this point, to recommend against it. Now think about it -- there were only 17 Staaken accepted and not all of them actually flew operationally. Yet, we may get three of them in kits -- this is akin to Roden's fascination with the Felixstowe (3 kits) -- and almost puts it on a par with the proportion of Tiger tank models to real ones. Don't get me wrong, I like their kits, and applaud the subject choice, but just how many Staaken kits does any one person have in them to build? I really wish they had released R.30/16 first - it is the most interesting version, in my opinion. I am tossing around the option of hacking this into R.30/16, the biggest drawback being that I'd need more decals. I'd probably be better off going for OOB and hoping I can finish it acceptably. I strongly recommend the Windsock Datafile 95, Staaken R.VI, by P.M. Grosz to supplement the instructions. For a detailed description of the construction of an R.VI, there is an excellent contemporary analysis in Janes Fighting Aircraft of World War One. This book also contains detailed information on Mercedes and Maybach engines. And a standard reference is The German Giants: The Story of the R-planes 1914-1919, by Haddow & Grosz. |
|
Information, images, and all other items placed electronically on this site are the intellectual property of IPMS/USA ®. |
)
)
)
)
)
)
)