| Attack Model Kits |
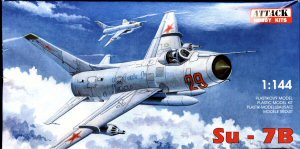
| Su-7B 'Fitter' A |
| Reviewed by Jim Pearsall, IPMS# 2209 |
|
|
MSRP: $9.98
Thanks to Attack for providing the review kit. Check the Attack website at www.attack-hobby-kits.cz/. The Aircraft: Pavel Sukhoi had a run of bad luck just after WW2. None of his jet designs clicked, and Stalin ordered the design bureau shut down in 1949. Four years later, after Stalin's death, it was decided that there needed to be an alternative to MiG, so the Sukhoi bureau was reinstated. The Su-7 was Sukhoi's first jet design to be built. It should be thought of as a contemporary of the F-100 Super Sabre. The Su-7B started out as a homeland defense interceptor, but it was found that the low-level performance and stability were superior to any then-current VVS aircraft, so it became the first Soviet supersonic tactical fighter-bomber. Unfortunately, the performance came at a cost, and the Su-7 had a "modest" warload. In his Supersonic Fighter Design, Roy Braybrook says that the sharply swept wing limits the carrying ability due to CG considerations. Nevertheless, it was the first, the granddaddy of all those other Sukhoi jet designs. Other versions followed, the Su-7BM, BKL, BMK, U, UM and UMK, all with some improvement in power, handling, avionics, etc. The various versions of the basic Su-7 were flown by the Soviets, Egypt, Hungary, India, Iraq, North Korea, Poland, Rumania, Afghanistan, Algeria, Czechoslovakia and East Germany. The Kit 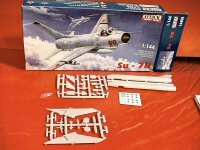
4 sprues, 3 grey, 1 clear, plus decals for VVS "red 29" in natural metal, and VVS "red 78" in camouflage. 47 parts plus the canopy. There are some extra weapons and racks, as the bombs and rocket pods used different racks, and the Su-7B could carry bombs OR rocket pods. The underfuselage fuel tanks were probably carried on most missions, as jets tend to use a LOT of fuel at low level, where the tactical jets hang out. The good stuff: 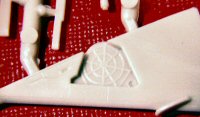 The kit is really pretty close to state-of-the-art for 1/144.
Recessed panel lines, a clear and thin canopy, no flash.
And there's some detail in there too. This is a wheel well.
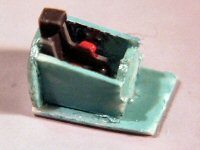
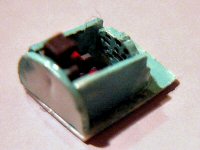
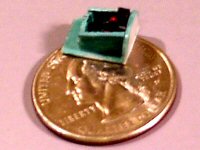
That noise you heard was my paradigm shifting. I have built the Attack 1/144 kits of the Shanyang JJ5 trainer, and the Aero L-39 Albatros. The Shenyang didn't have anything for a cockpit. Paint the top of the fuselage black, and put the canopy on. The L-39 has 2 rudimentary chairs to represent seats. The Su-7B has a cockpit! An ejection seat! An instrument panel! In 1/144! No side consoles, but at this rate, they're going to have them next. And how big is this? About like that… |
|
|
The other stuff:
The kit goes together nicely.
There are no locating pins, slots, holes, etc for the external stores, but the instructions are pretty explicit about how they're supposed to go on, and location information was clear to me.
I had to use a little putty on the fuselage halves to get a clean looking seam, and the nose radar cone wanted to wander off center as I was trying to locate and fit the fuselage halves.
The main gear doors are too thick, but there's a limit to how thin you can make a piece of plastic and have the mold cavity fill reliably.
If my AMS demanded thin doors, I could use the kit units and cut them from 15 thousandths sheet.
Finishing: I really like tactical camouflage on an aircraft. Natural metal does little or nothing for me. So I decided to do "red 78", in tactical camouflage. The color call out on the instructions is for Humbrol paints. But through the use of Dave Klaus's IPMS Color Manual and the IPMS Sweden web site, I was able to decipher which colors to use. This still left me with a small dilemma. The small drawings on the instruction sheet had coding to show where the different colors went, but I had problems seeing the different "textures" used to differentiate the colors. I fell back on a 21st Century fix. I scanned the quarter-page of the instructions and blew them up to full page size. 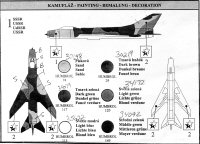
Then I took the result into Paintshop and colorized it, so I could see what colors I needed and where. 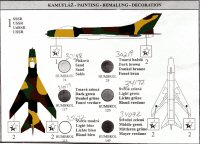
After painting (and fixing overspray) I applied the usual coat of Future and the decals. Eastern European decals have certainly come a long way. These behaved nicely, could be moved a bit, but once I wicked off the excess water and Micro-Sol, they stayed put. They showed no tendency to curl, split, run, or deform. I applied a coat of Testors® Acrylic Flat and added the canopy. Finished. And not bad looking. |
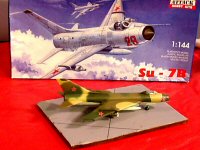
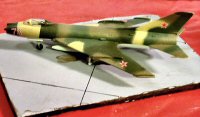
|
|
Overall: A really great kit. The detail is rudimentary, but like a dog walking on its hind legs, the marvel isn't how well he does it, it's that he does it at all. This is the first 1/144 fighter kit I've seen with instrument panel detail. No, make that "an instrument panel". There's not much detail there, but what can you see on an instrument 25 thousandths in diameter? And the interior detail on the main gear is a nice touch, even if it's as hard to see as the instruments. Thanks to John Noack for another adventure in modeling. |
|
Information, images, and all other items placed electronically on this site are the intellectual property of IPMS/USA ®. |