|
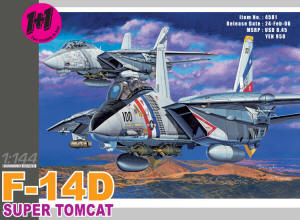
Dragon Models 1/144 F-14D Super Tomcat VF-2 'Bounty Hunters' |
|
Kit Number 4581 |
|
Reviewed By Jim Pearsall, #2209 |
|
|
|
MSRP: $9.95 USD Thanks to Dragon Models USA for providing the review kit. The Aircraft: The F-14 was the US NavyÆs premiere fighter. The patch depicting a twin tailed tomcat with a holstered .45 in a relaxed pose with ōAnytime, Babyö was the hallmark of the true Naval Aviator. But times change, circumstances change, and missions change. And the F-14 Tomcat changed with them. With a vastly reduced threat to the fleet due to the collapse of the Soviet Union, there was less need for a fleet defense fighter. But with the cancellation of the A-12 program in 1990, a new opportunity arose. There was a need for a high-performance bomb delivery system, and by golly, the Tomcat was the chosen one. The F/A-18 is a capable system, and the new ōSuper Hornetö overcomes a number of shortcomings of the type. The Hornet (A through D models) were seen as short ranged, and not capable of carrying a large enough weapons load. With the Phoenixes removed, a Tomcat can carry 18 Mk 82 bombs, thatÆs 4 Į tons. Or just 2 X 2000 lb Mk 84s. But just carrying the bombs isnÆt all you need. Hitting the target would be a nice thing, too. Grumman had originally designed the F-14 with a secondary air-to-ground capability, but apparently the capability was allowed to languish during the F-14Æs days as the premier shipboard air superiority aircraft. So there was a certain amount of scrambling to get F-14s up to a useable capability when we wanted to plant explosives inland in Bosnia, Kosovo and the FYROM. With the upgrading of software and hardware, the Bombcat became a capable system. |
|
|
| The Kit: |
|
|
| You get two sets of everything in this kit. There are two F-14s, two sets of weapons, and enough decals to do two aircraft of VF-2, the CAG aircraft, 100, and a plain vanilla plane, number 106. |
|
|
|
The kits are separately bagged, so thereÆs no problem figuring which parts
go with which aircraft. The instruction sheet is a single sheet,
printed in full color, with a parts locator, a color reference table,
full marking instructions for both aircraft, and an assembly diagram. The color reference table is a real gem. It has the Mr. Color reference, Model Master reference, the FS595 reference (where available), and the color is named in 5 languages. This is SO superior to some color tables IÆve seen recently where the colors referenced are for paints I canÆt find, and thereÆs no reference to, and the colors are listed as something like ōpinkish aubergine, NZ Navy, 1950sö. The painting instructions are great, with color callouts and a decent 3-view drawing which allowed me to do a credible paint job. This kit is the first one where I used TamiyaÆs tape, and I found it to be very useful, not too thick, bendable, and not to aggressively sticky. |
|
|
| The molding on this kit is somewhere between good and outstanding. I was taken by the nice, clean molding on the bombs. Everything is so tiny, but so crisp. And, unlike a lot of 1/144 fighter models, it LOOKS like a Tomcat. It captures all those subtle angles and curves that make a modern fighter. |
|
|
|
Building the Kit: As seen on the bombs above, a problem facing the builder is that in order to get the plastic to flow into the mold, the connectors between the part and the sprue are relatively large when compared to the parts. Nevertheless, the engineers who designed this mold did have their thinking caps on, and if you use a flush cutting tool and some care, the parts come off cleanly. It does take a couple of minutes to adequately clean up the connections, but nowhere did I run into one of those places where the cutting and sanding caused fit problems or a really bad cosmetic problem. I did originally think there would be a problem with the intake trunks. They connect to the sprues so the connection is flush with the fuselage sides, and I thought that any imperfections would be immediately visible. TheyÆre nicely covered by the wheel well doors and the landing gear legs. The interior is sparse, consisting of two pilot figures, the seats, and instrument panels. Nevertheless, I applaud Dragon for this, as IÆve seen recent 1/144 kits with absolutely nothing under the canopy. Because of the tiny size, the pilot and R.S.O. are reminiscent of the 1960s vintage figures produced by Frog, who were referred to as ōlittle Martiansö. Nevertheless, with black O2 masks, black visors, white helmets and green ōjet jammiesö, the figures look pretty good. The interior is there, and itÆd be a pity if you couldnÆt see it. Which leads me to another adventure. The canopy is very clear, fine and extremely thin. Very thin. Fragile and thin. While masking, I split the canopy right down the center. I suggest treating the canopies on any of these kits as if they were fragile vacuform units, and put Blu-Tak, modeling clay or some other support inside before handling it. This is why reading a review can be useful before you build the kit. But you CAN see the pilots in there, as well as the ejection seats. DonÆt bother doing any detailing on consoles, panels or floor. Those you wonÆt be able to see in this scale. The assembly is pretty straight forward. The fuselage forward halves fit nicely, although I did use a little putty attaching the forward fuselage to the main body/wing assembly. I used a little Mr. Surfacer 500 at the bottom of the vertical stabilizers. I had to gently ōformö the left horizontal stabilizer to get it parallel with the right one. ōFormingö is the technical term we used to use instead of ōbendö. |
|
|
|
After the entire aircraft was mostly assembled, and it really began
looking like a Tomcat, I ran into the area which took time, patience and
a certain amount of ōWell they could have done something here to make my
life simpler!ö There are locating pins on the under fuselage pallets
which hold the bombs. But there arenÆt any holes for these pins to go
into. Same with the fuel tanks, sidewinder rails, and the wing glove
pylons. I drilled the holes for the bomb pallets, but wound up just
cutting the pins off the other parts and using CA to provide a strong
attachment. I would also have liked to see a scrap drawing about where and how the wing glove pylons attached, but thatÆs why they sell all those reference books. |
|
|
|
Spray it with Future and youÆre ready for markings. Decals: |
|
|
|
I am very satisfied with the quality, fit and usability of the decals
provided in the kit. I used a touch of watered white glue and a bit of
MicroSet « where the decals were to go, and they moved nicely to allow
some adjustment. Another feature I liked was that it only took about 10
to 15 seconds for the decal to be ready to slide off the backing paper
after I dipped it. By the time I put on the white glue and the solvent,
found the tweezers and toothpick, the decal was ready to apply.
ItÆs probably more of a kudos to the decal manufacturer than to me that all decals went on straight without splitting, cracking, folding or sticking to my finger. |
|
|
|
Overall Assessment: I enjoyed building this kit, and the finished model is one of my better ones. There are a couple of things IÆll do differently when I build the second kit in the box, but itÆs been a good experience. The thought and engineering which went into the parts is above average, the decals are very good, and the paint reference chart is one of the best IÆve ever used. Nevertheless, this is not a kit you buy for a 10 year old with any expectation of success. The fiddly little parts make patience and experience prerequisites for successful completion. But someone with a couple of previous successful kits completed could easily turn out a quality representation of the Tomcat in its final years. Thanks to John Noack for another chance to improve my building skills. Jim Pearsall |
|
Information, images, and all other items placed electronically on this site are the intellectual property of IPMS/USA «. |
)
)
)
)
)
)

)