|
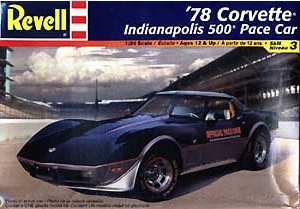
Revell 1/24 1978 Corvette Indy 500 Pace Car | |
|
Kit Number 2168 | |
|
Reviewed By Walt Fink, #2447 | |
|
| |
|
MSRP: $16.50 USD Revell's '78 Corvette Indy Pace Car is a re-release of the kit initially marketed right after the 1978 Indy race, so it has a few items that date it a bit. What you really get in the kit, however, is somewhat of a 2-in-1 offering which can be built as a stock '78 Vette, or by using the additional parts and special decals the Pace Car or replica, so in my view that offsets its age. Construction starts under the hood; the engine [Photo 1] builds up into a fairly nice replica of the L82 V-8 with the exception that it only features one cold air snorkel and my references indicate that the production engine had two. When painted and highlighted with a dark wash, it's effective in its appearance, however. [Photo 2] Like so many other kits, the alternator just hangs out in mid-air by itself when it's attached to the fan belt, and would benefit from a bracket added from styrene or brass. | |
) |
) |
|
Construction of the chassis and suspension comes next and is straightforward, though the instruction sheet doesn't quite show the positioning of the rear end very clearly. The drive shaft-to-universal flex joint has to be positioned above the floor pan, and some dry-fitting will show this before things are glued together. [Photos 3 and 4] | |
) |
) |
|
The dual exhaust system fit the chassis OK but was warped sufficiently that I used a brass pin to secure the left side muffler better than it's butt-jointed mounting pin provides. The interior is a one-piece tub with no pedals, but this doesn't detract too much from the finished appearance, as they'd be so far forward they'd be hard to see anyway. The steering column had a couple big sink marks due to the thickness of the plastic that had to be filled. The nice instrument panel features raised details on the gauges, but I opted to use the decals provided for the instrument faces, with a drop of Future providing the "glass" over each and also to secure the decals in position. [Photo 5] The Pace Car and the 6,502 replicas made by GM that year all featured a two-tone, black-over-metallic silver paint job, with silver leather interior. I used Testors Non-Buffing Aluminum Metalizer for the interior silver, and a couple shades of Gunze Sangyo light gray acrylic for the carpeting and floor mats for contrast. The steering wheel should be painted silver, too, not chrome as stated in the instructions, and the center instrument panel and console should also be painted black, not silver as the instructions specify. According to the photos of the real car I've got, the black center console armrest area extended only as far as the parking brake handle, not all the way to the back of the cockpit as shown on the instruction sheet. Lastly, the instructions show the seats being placed in the rear shelf area, but I don't think anyone's really going to make the mistake of actually putting them there, even an airplane nut like me. I used Bare-Metal foil for the door handles and window controls, and when built up, the interior looks pretty nice. [Photo 6] | |
) |
) |
|
The body has some problems. Both the front and rear fascias are too wide, and need to be sanded down. [Photos 7 and 8] I deviated from the assembly sequence and glued both in place before doing any other bodywork. (The instructions show both fascias being attached after the interior tub and chassis are installed). After puttying and sanding these down, I sanded off the few mold lines on the body and prepared it for painting. The mold line runs very close to the exterior door handles and is a little hard to clean up in this area. The kit provides decals for the crossed flags and "Limited Edition" lettering on the front fenders so I sanded these raised details off the body. I left the hood and trunk ornaments on, and foiled them after painting, rather than using the provided decals. I also foiled the exterior door handles and key locks. The instructions state that the front fascia is to be painted silver, but its upper half should be gloss black. |
|
) |
) |
|
The chin spoiler on my sample wasn't a very close fit, and was sanded a bit to achieve a decent fit. I felt that the deck lid spoiler was slightly too large and even though it fit pretty well, extended down the rear fenders enough to cause some interference with the body stripe decals. Some of the color callouts seemed to be in conflict; the master cylinder's painted gold on the box art photo, but my references show it to be silver on the real car. The air filter and snorkel are listed as "chrome" on the instruction sheet, and are in fact on the chrome tree, but should be painted semi gloss black. In addition to the interior faults I mentioned above, the instructions also call for aluminum-painted windshield trim, but photos of the real car show that to be black. I painted my model twice. The first time I started with Gunze Sangyo Metallic Silver Acrylic, but it was slightly too grainy for my taste, so I stripped it off (always a messy job) and gave the body an overall coat of Testors gloss black enamel. When dry, I masked off the upper half of the body and sprayed the lower half with Testors Non-Buffing Aluminum Metalizer. The decals are excellent and feature a multi-colored cheat line in four pieces which goes around the car to separate the colors with a precise line. It has an upper black, and a lower silver stripe (with red piping). This is a good idea, but in order for the stripe to function as intended, the silver needs to match the silver that the builder paints on the car's lower half. I didn't think it did, so trimmed off that part and applied the decals beginning with the side stripes. I was pleasantly surprised that they fit beautifully, even over the wheel flares. I had to use lots of patience and decal solvent at each corner of the car to get them to snuggle down. Once all the decals were in place and dry, I overcoated them with Gunze Sangyo H30 Clear Gloss to seal and protect them. After I'd finished the body shell, I noticed that the black of the cheat line stripe didn't match the black enamel I painted the car with, so it's visible if you look closely. Had I known this would happen, I'd have also trimmed off the black part of the cheat line as well as the silver, and relied upon my masking a straight line. As I say, the concept behind the Revell decal is very good---just match the paint better on your 'Vette than I did on mine. The decal sheet also gives the red circular stripes to be applied to the chrome wheel rims, and the hub flags. Took a little time to get these in place but it was actually easier than I thought it'd be. The instruction sheet also states that the decal sheet contains the Indy logos for the bucket seats, but they didn't appear on my sample. The tires are plain blackwalls, with no outline lettering as the Indy Pace car or its replicas had. This circumvents the ever-popular licensing agreement with a certain tire manufacturer who seems to pursue our hobby as a means of padding their treasury, but it also means the car's not really complete as a replica. This lettering is available in dry transfer form should the builder want to replicate this feature. No side windows are provided, but the windshield, rear window, and two removable T-Top sections are given which are nicely done and optically clear. I tinted all the windows on my model with a light spray of Gunze Sangyo H95 Smoke Gray. The hood doesn't hinge very well and needs retainers (not supplied) on the inside of the fenders to rectify this; I used strips of plastic sheet to make some, but was only partly successful in my efforts at a smoothly-opening bonnet. The chrome side moldings needed a little judicious bending to get them to fit the rocker panel areas. The small circle on the upper left rear fender represents the antenna; I drilled it out and added a mast from hypodermic tubing. In summary the kit needed a little more work than others I've done, due to less-than-perfect fit of some of the parts and the complexity of the exterior painting scheme and decals. A builder wanting to add a stock '78 'Vette to their collection will have a much easier time than one building the Pace Car. Still, the paint job is striking, the red decals are great accents for it, and when finished, the model is a handsome addition to my growing auto model collection. Thanks to Revell and to IPMS/USA for the chance to review this kit. | |
) |
) |
) |
) |
|
|
) |
|
Information, images, and all other items placed electronically on this site are the intellectual property of IPMS/USA ®. | |
)