|
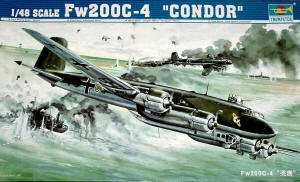
Trumpeter 1/48 Fw200C-4 Condor |
|
|
Kit Number 02814 |
|
|
Reviewed By Dave Morrissette, #33653 |
|
|
|
|
|
MSRP: $129.95 USD Trumpeter never ceases to amaze me. They are coming out with the kits that people want and have requested for many years. One of the latest on this list is the 1/48 scale FW200 Condor, a four engine WWII reconnaissance plane used for patrols an spotting convoys amongst other duties. Let’s jump in and see what’s in the box! There are six sprues of medium gray plastic along with a clear sprue, decals, and film for the instrument panel. The two fuselage halves come already detached from the sprues. Engraving is excellent, not overdone. Clear parts are thin and very transparent. There are decals options for two variants and a separate, full color sheet for painting instructions- more on that later. Assembly starts with the interior that is complete from the cockpit to the rear of the plane and is in three parts. Detail includes all the necessary gas tanks, recon camera, batteries, bulkheads and clear lights for the bulkheads. Detail is good. One problem here was that the gas tanks are in two halves, and each requires sanding and filling to get them smooth. There are five of these so it is a fair amount of work but it is not too noticeable when the fuselage is closed up. All seats need the addition of belts. Cockpit detail is good with a nice instrument panel made from film and a clear panel. The cockpit was painted RLM66 while the remainder of the interior is primarily RLM02. Once the interior was painted, washed and dry brushed, I installed the clear windows and they fit very well. When it is time to close the fuselage, there are a couple of recommendations I can give you. First, the plastic is reasonably thick, but for this size of kit it still warped slightly. I should have dry fitted more often, and would have had a better seam along the top that would have saved me several sanding sessions. I should have dry fit and then glued around the fuselage with more time to dry than I did. For me, my lack of patience ended up in a slight mismatch of the fuselage near the back door that caused extra work. Second, the bulkheads towards the middle of the plane fall short of the top and allow slight mismatching that caused a few more additional spots to sand. Overall, however, the fit is good. The wings can be built next and include separate flaps. I left mine up. There are some ejector pin marks that would have to be dealt with if the flaps are extended. The wings also include separate ailerons and there are no metal hinges. I was ready to attached the wings to the fuselage and here is where my biggest recommendation comes- you definitely need a spar added to the wings to support the joint between the wings and fuselage. The wings are very long and thick, and the fit is excellent, BUT as you move the plane around, the wings flex. I fixed the wing/fuselage joint three times prior to finishing the plane just due to this flexing. A brass or wood spar will fit and can be epoxied into place to give the joint the strength it needs. The engines and nacelles are separate. The engines include back and front sections, and look good in the cowlings. The cowlings are two pieces each and need a little filling and sanding to get smooth. Trumpeter has represented the exhaust stubs on each engine well with seven separate groups of pipes that fit well. Once the group of four is done (remember to keep the inner and outer engine parts separated), they are attached to the wings. The horizontal stabilizers and canopy are added- both fit well - and you can start painting. The paint scheme on the box is wrong from all the references I could find. The correct colors are RML65 on the bottom and RLM/72/73 on the top in a splinter scheme, and that is what I used. I painted the ventral gondola separate as it fit well enough on its own. While the main camouflage was drying, I turned my attention to the landing gear, which is well replicated given the complicated approach used on the FW200. Each main gear consists of 11 parts plus tires and is well engineered. They bear the weight of the kit well - which is what I was concerned about when I saw the kit’s size. A quick clear coat and the decals went on like a charm. I weathered the plane, added all the pieces parts like the turret and guns and the landing gear and then used about 1/3 of a bottle of Dullcote on the plane…and that did it. Honestly, the hardest part of this kit was finding room to place it when I finished it or an easy was to get pictures. It is very large! The kit will hopefully see some aftermarket stuff for those who want an even larger amount of detail and more decal options. Fit is good but requires some work on the gas tanks and the fuselage. Don’t forget to add a wing spar and you will have a beautiful addition to your WWII collection. I’d like to thank Mike Bass and Stevens International for the chance to review this beauty. Recommended! |
|
) |
) |
) |
) |
) |
) |
) |
) |
|
|
) |
|
Information, images, and all other items placed electronically on this site are the intellectual property of IPMS/USA ®. |
|
)