|
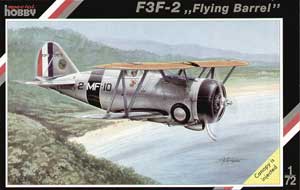
Special Hobby Grumman F3F-2 |
|
|
Kit Number SH72103 |
|
|
Reviewed By Brian R. Baker, #43146 |
|
|
|
|
|
MSRP: $20.00 USD HISTORY: The F3F-2 represents the high point in the development of the Grumman biplane carrier fighter during the late thirties. The Grumman Corporation was originally formed in 1929 to produce amphibious floats for O2U and O3U aircraft, incorporating a unique retractable landing gear system. The firm’s first complete airplane, the two seat FF-1, appeared in the early thirties, culminating in the FF-2 and SF-1 versions which were used by Navy units. The single seat F2F-1 first appeared in 1933, and although some 54 were manufactured, the Navy was not entirely satisfied with the stability and stall characteristics. When issued to a number of squadrons, the F2F-1 was seen essentially as a stopgap fighter to be used until the more refined F3F-1 was available. This was an enlarged variant, and although the early prototypes crashed, 54 were ordered, and these initially served with VF-5B, VF-6B, and VF-4M, a Marine Corps unit. In addition, VF-3 and VF-7 also operated F3F-1’s before they were given to training units as the more powerful F3F-2 became available. The F3F-2 was an upgraded F3F-1 powered by an 865 hp. single row Wright R-1820-65 Cyclone radial engine, which replaced the twin-row Pratt and Whitney R-1535-72 on the F3F-1. F3F-2’s began to reach the fleet in late 1937, and by 1938, they were being flown by VF-6, VF-5, VMF-1, and VMF-2. Later units to use the type were VF-4 and the usual training units. The last F3F was stricken from the Navy list in November, 1943. When the expansion programs began in the late thirties, an improved model, the F3F-3, was introduced to equip squadrons until the Brewster F2A and Grumman F4F monoplane fighters became available. Differing mainly in power plant, both models carried the same Grumman designation, G-19, and were indistinguishable externally except for the designation on the rudder. Only 27 F3F-3’s were produced, and these served mainly with VF-5 on Yorktown, as well as being issued to VF-4 and VF-6 as replacements for F3F-2’s. An interesting sidelight on the F3F story is the fact that although none survived World War II, in April, 1990, divers discovered an intact F3F-2 that had ditched in 1800 feet of water off San Diego. The plane was recovered, and eventually restored to displayable condition, and is now at the Naval Aviation Museum at Pensacola. In addition, this aircraft was used as a pattern to construct three additional F3F’s, including a two-seater. These are currently flying. One is owned by the Lone Star Flight Museum at Galveston, Texas, while the other two are operated by Cinema Air, at Palomar Airport, in California. I have seen these aircraft, and they are very impressive. KIT HISTORY: The first F3F kits were vacuform models appearing in the 1970’s. The first injection molded kit was issued by Pegasus in the eighties, and it was a pretty crude kit, but it did look like the airplane, and it was a very welcome addition at the time. More recently, MPM issued an F3F-1, with resin engine and cowling, and this kit is the basis for the Special Hobby F3F-2 kit. Although the sprues are arranged differently, they are basically the same molds except for the engine and propeller. Again, an F3F-3 could be built from this kit with no modification except for the markings. Cast in soft, light grey polystyrene, the kit includes 40 plastic parts, 5 resin parts, a sheet of photo-etched metal with some VERY small parts, and an injection molded canopy. They are typical Eastern European epoxy molds, with accurate outlines and good surface detail. Most parts are nicely done, but there is some trimming required, and a few parts require major work. The propeller, although the right size, had blades that are way too narrow, and these need to be replaced. In addition, the prop shaft that goes into the engine is too large, making it necessary to drill out the front of the engine to accept the larger shaft. All panel lines appear to be accurate and not overdone. The interior detail provided is excellent, more than you can see through the canopy. If you want the canopy open, you’ll have to cut it open. With only one canopy provided, I took the path of the coward and left it closed. Two canopies, one opened and one closed, would have been nice. The instructions are quite complete, although some information is rather confusing. Some of the assembly process is not clearly explained, especially in the interior structure, landing gear, and wheel wells. There is a front view, which shows flying and landing wires, but their positions in between the wings must be obtained from other sources. A good photo or drawing would solve the problem. There are four different aircraft that can be done using kit decals, and the four view drawings are fairly complete here, except for the black wing walk and fairing markings which show in photos of the aircraft, but not in the kit instructions. ASSEMBLY: Assembly is straightforward. The thin wing sections are cast in one piece, but locations for the wing struts are only faintly marked, requiring drilling a small hole to assure the correct location. This is not a problem for an experienced modeler. There are no slots for the lower wings or tail-planes, and they just butt mount onto the fuselage. A three view drawing on the instruction sheet provides the proper angle, but I would suggest using a reference drawing to make sure of the dihedral angle. The landing gear is another story, as it is very detailed, and requires the placement of the internal fuselage structure inside the fuselage before the fuselage halves are joined. The instructions show WHERE to put the structure, but not EXACTLY where. You’re on your own here. There are no slots or holes to attach the gear to, although the lower gear struts are cast in place, so alignment is not a serious problem. A small “V” strut is included, and this goes in between the main gear strut and the top bracing. I gave up on this and use thin rod instead, and it worked fine. At this point, some major decisions must be made. The assembly instructions and decal sheet provide markings for four different aircraft, two from VMF-2 in 1940 (one with tail stripes, and one without), one in overall neutral grey from VMF-2 in 1941with white codes on the fuselage sides, and one in blue over grey, probably a fighter trainer operated during 1941 and 1942. You’ll have to pick one. If you are doing the overall light grey version, painting is unnecessary until after final assembly, but the other versions require painting before the top wing is in position. I did the colorful pre-war version operated by VMF-2, since my Pegasus kit is from VMF-1. I am surprised that they did not provide decals for a Navy version operated by VF-4 or VF-6, as these were equally colorful. However, four color schemes and decals are about as much as one can expect. Also, although photos show many of these aircraft with black wing root fairings and wing walks, these are not included in the marking instructions. It is true that some aircraft may not have had them painted black, but this is why we use references as well as kit instructions. Assembling the upper wing is tricky, but not too difficult. First, mount the “N” struts on the lower wings in their proper positions at the proper angle. I used superglue, but Tenax could be used sparingly instead. The angle is the important thing if the struts are to line up properly. Once these have dried, then place the upper wing inverted on the table, and mount the struts to it. If your marking holes are in the proper locations, it is not difficult, just tedious. I measured the distance with a set of dividers, and that worked out fine. Mount the cabanes last, the longer one to the rear. The locations of the attachment points to the fuselage are unmarked, but the struts measure out perfectly, so this is relatively easy. The engine and cowling are a major problem. The engine mounts directly to the firewall on a circular mount, and the cowling fits over the engine and is supposed to line up in its correct position against the forward section of the fuselage. It takes some filing on the engine cylinders to get this to happen, and I was not entirely satisfied with the way it worked out. The engine does not line up properly on the mount, and it has to be mounted at least a scale foot below where it is supposed to or the cowling would be so high that the pilot couldn’t see ahead of the airplane in level flight. The instructions show the location of the low frequency radio antenna installation, but no information is provided on the interplane rigging. This is where reference material comes in handy. Probably the best single source is the Squadron In-Action issue on the Grumman Biplane Fighters, although an old Profile covers the same subject, and the aircraft is covered in numerous books on U.S. military aircraft. Some on-line sources are also useful, with photos of the replica aircraft that are now flying. DECALS AND MARKINGS: The decals are VERY thin but of excellent quality. Register is right on the money, and many small maintenance markings are provided. Decals for the blue squadron markings are not provided, so these need to be painted on. However, the little black and white trim lines are provided, and these can be used to edge the blue stripes on the fuselage and top wing. There is no black stripe provided for the cowling, however, although the airplane certainly had one. Markings are provided for the propeller tips, and these would be wide enough if the prop blades were shaped correctly, but they are way too large for the prop in the box. OVERALL IMPRESSIONS: This kit is a worthwhile addition to any 1/72 scale collection of U.S. Navy and Marine Corps fighters of the thirties. It is accurate, colorful, but not in any sense a “shake the box” kit. It requires patience, a true nautical vocabulary, and devotion to duty. A lot of parts require trimming, and a few, like the propeller, need replacing or serious reworking. I left mine in the original condition, but will replace it shortly. However, it can result in a good model, and it is well worth getting one or two. I would recommend the kit to serious modelers mainly because of the importance of the type, and because it can be built into a very acceptable model. Thanks to the Special Hobby people for the review sample. |
|
) |
) |
|
|
|
|
Information, images, and all other items placed electronically on this site are the intellectual property of IPMS/USA ®. |
|
)