|
Sharkit Horten IIIf 1/72 Scale |
|
Reviewed By Orlando Reyes, #6399 |
|
|
|
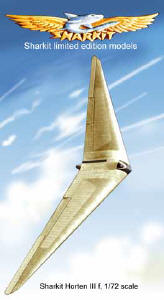
Manufacturer: Sharkit (http://perso.club-internet.fr/renax/sharkit/sharkit.htm),
renax@sharkit.com (Email for price and shipping information) The kit comes in a sturdy card box container with a picture of a Horten IIIF in flight. The content inside consists of three (3) resin parts, two (2) white vac-form plastic, two clear canopies. In addition there is a small plastic bag containing a control column or yoke, two (2) metal rods to be used as skies; a 1/72-scale figure and a set of plans. The plans contain a small history of the sailplane. The plans also contain a cross section of the wing to scale, as well as several exploded views of the kit. Unfortunately, the plans have some very poor directions of how to build the kit with no sizes given for the skids (part #5, #6 & #9). Since this aircraft was a commercial/private venture there are no stencils/decals of any type. I encountered problems from the very beginning, as I could not glue the wings to the central section. I had to drill holes for two (2) small metal rods on the wings, and corresponding holes on the central section to be able to glue the parts together. This not only aligned the wings correctly but gave the correct dihedral. There was a gap between the wings and center section that I filled with Green Putty, sanded and blended. The next problem was to glue the vac-form parts to the central area. After much trial and error I used instant glue to secure the parts. I did not install the figure and had a hole in that area that did not know how to fill or improve as there was no detail given. I felt that since it was a sailplane there was probably not much in there except for the control column or yoke. The two canopies are so fragile that both of them on my kit were ruined and could not be used. The size of the canopy was a little confusing as they appear to be very large but in reality it is much smaller than the part. The top area has to be painted the same color as the wings while the bottom area has to be left open and framing has to be added. In one section of the plan’s parts five & six appear to be installed or in contact with the yoke, while in another section of the plans they appear to be in contact with the canopy. The second choice is the correct one but one very difficult to correct is you do not paid attention while building the kit. I could not install these parts as I ruined the canopy. The yoke and its column I made from my spare parts, including a small section of plastic tubing. It looks good. I have not painted the kit yet as was unable to find the appropriate color scheme. Although I had lots of problems with the kit I enjoyed building it. Right now the kit is set aside as I plan to make a diorama showing the kit, with no canopy, being viewed by several prospective pilots. I will probably use some of the Airfix Luftwaffe crews to make the diorama, but this is in the future. The kit is recommended for experience modelers. I would like to thank Sharkit for providing the kit for review. Happy Modeling. |
|
Information, images, and all other items placed electronically on this site are the intellectual property of IPMS/USA ®. |