|
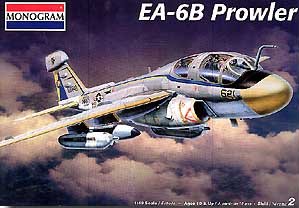
Revell-Monogram Kit Number 1/48 EA-6B Prowler |
|
|
Reviewed By Charles Landrum, #26328 |
|
|
|
|
|
Suggested Retail Price - $28.98 A lot has already been written about the Revell-Monogram EA-6B kit, warts and all. So I will focus my review on the corrections I made to make it a realistic replica. In fact, my goal was to not only build the kit as a review for IPMS, but also to prepare the model for a museum exhibit at the Hampton Air and Space Museum. The museum is in the possession of a 1/48 scale NIMITZ Class Carrier, RONALD REAGAN. They asked IPMS Tidewater to help populate the flight deck with modern aircraft like the kind that she will carry. Since an air wing has not yet been assigned, the models have to be devoid of any squadron/air wing insignia. This plane will sit behind the jet blast deflector of catapult 1, waiting its turn to launch. So my build was easy – wings extended, flaps and slats up, with full crew and stores. I therefore wanted an aircraft that was up to date in outward appearance without having to sweat the details in the cockpit or the wheel wells. These areas got an out-of-the-box treatment. The kit comes in a heavy, sturdy box with the same box art as in the original release; just the background color is different. All of the parts sealed in plastic bags, save two. Both sets of canopy sprues, clear and gold-tinted, are allowed to rattle around in the box. Generally this results in scuffing, but in my box the forward canopy in the clear set was shattered into three pieces! Fortunately I was using the tinted piece so I didn’t have to ask for a replacement. Much has been said by modelers about this practice at Revell-Monogram – it needs to be stopped!! The decals provide only one scheme, the same one from the original release, a high-visibility scheme that is now dated. They are well printed, but it would have been a nice touch by Revell-Monogram to include a low visibility scheme as well. The good news is that Revell-Monogram revised the instruction sheet and it is no longer the poor pictogram style of the earlier release. In the same basic format, parts are now identified by name and color call outs are provided. There is even an inset that shows the correct positioning and angle for the refueling probe; here Revell-Monogram listened. The aircraft represented by the kit is an EA-6B ICAP 1. The Navy is up to ICAP 2, Block 89. So the aircraft configuration is that of a mid 1980s EA-6B and requires quite a bit of effort to modernize it to this latest standard. As has already been mentioned elsewhere, this kit reuses the wings from the A-6 kit, in fact the whole sprue is included. What Revell-Monogram doesn’t tell you, is which parts are not used in the build. Here is my list of A-6 specific parts you can add to your spares bin: the dive brakes (12, 13, 22, 23), the canopy deck (26), Pylons (90, 111) and sway braces (51). There is some flash present, but it’s not too bad. The tinted canopies are a bit too yellow this time around; I prefer the subtler tinting of the earlier release. Construction. I started with the cockpit, which I built buttoned up with a crew. It is a nicely detailed ICAP I configuration cockpit. Dark Gull Gray (FS 36231) is the base color for modern USN aircraft cockpits. I painted the consoles interior black, which dry-brushed well. The Martin Baker GRU-7 ejection seats build up nicely and when painted black with olive cushions, washed and dry-brushed look convincing. Since I was putting the crew in, I shaved off the seat harnesses. To vary the look of the crew I mixed and matched figures and parts from my spares box to include Monogram, Hasegawa and Airfix. With the four figures (other pilots call the Prowler “the Station Wagon” for good reason!) it looks sufficiently busy. The cockpit was a pleasant diversion while I made the structural modifications to the fuselage. |
|
) |
) |
| To build a Prowler that is even close to accurate, the A-6 style armor has to come off the wings and fuselage. Removing the armor was an easier task on the flat wings, the curved fuselage was tricky. I tried two techniques. I carefully ground off the armor with a cylindrically shaped router bit in my Dremel. Despite my effort it resulted in a rough surface that took a lot of sanding and CA as filler to smooth. On the other side, I had better success with a new X-Acto blade that I used to shave down the armor. It was slower, but in the end, less overall work was required to smooth the area. At the same time I reworked the wing-folds. As mentioned the kits wings are those of an older A-6. The Prowler has a different stiffener plate at this point. So I filed down the plate and filled the fold down its center with CA. The result more closely resembles the wing of the Prowler. With these modifications done, I was happy with the wings, but the fuselage lost a lot of detail in the process. | |
) |
) |
|
With the armor removed, I started assembling the fuselage
and wings. I used CA for the trailing edge and liquid cement for the
leading edge. Liquid cement could have warped or distorted the thin
training edge. I pre-painted, washed and dry brushed the interior
around the cockpit before gluing the cockpit to one fuselage half – it
ended up fitting tightly all around! I also glued in a large amount
of weight; this model is a real tail sitter. The fuselage has four
major components, two halves, a belly insert and the tail hook well.
There isn’t much nose surface area to glue with such a large belly insert
and large cockpit. I dry fitted the two fuselage halves and
discovered that the right half was twisted. So I glued the belly
insert and tail hook assembly into the left half. Once thoroughly
dried, I assembled the left half to the right, ensuring I did not induce
any warp. Overall the fit was good, but the parts break down
requires a lot of clean up in an area complexly shaped. I then
attached the wings. There was no gap and the fit was tight.
There was slight step at the right wing root that I eliminated with filing
and CA as filler. I also added the horizontal stabilators, which
required a little cleanup at their root to achieve a tight fit. They
are designed to interlock but will droop a little, so I used tape to keep
them level. Curiously the main wheel wells are two different sizes.
I don’t know if it is prototypical. I had to shave off some of the
molded detail in the well overhead on one side to achieve a gap free fit.
Overall, there are large gaps in the wells that require a fair amount of
filler to hide. With the fuselage together, I painted and assembled the intakes. I painted the fan blades buffable Model Master Anodonic Metal, and the intakes flat Insignia White. With careful sanding and fitting, I was able to minimize the seam in the intake. The fit of the right intake to the fuselage was tight, but does require sanding to eliminate a slight step. The fit of the left intake was horrible. The kit is designed to have the left boarding ladder down, but I glued it closed. Perhaps I did something wrong, but I ended up grinding away most of the back of the compressor fan, without punching through to get a decent fit. Next I fitted the instrument panel coaming and the canopies. The fit of the coaming is tricky because there are no precise locating guides. I had to thin the overhanging lip to get it flush with the IP and to allow the coaming to sit on the fuselage. Once in place, I sprayed it Instrument Black and dry-brushed it with Dark Gull Gray. The fit of the windscreen was fine, but I used white glue to better fair it into the fuselage. The fit of the canopies was fair; I had a gap between the aft canopy and the fuselage. In fact the fuselage edges in this area are a bit rounded which, when assembled, forms a small triangular gap at the back of each canopy. I used white glue as filler here as well. I used CA over the white glue after it cured, to provide a hard sand able surface. While sanding the CA, I faired the canopies into the fuselage to eliminate a slight step. When I was all done, I realized that I forgot to add the pilot’s HUD! At this point I started updating the plane’s exterior to ICAP II block 89 configuration. I made these modifications because these details would be visible to the public. I really didn’t have a clear drawing as to the antenna shapes and locations, so I used available photographic references online to get close. Most of the blade antennas were made from .02 inch styrene strip. I added only one dorsal intake, pre-drilling the scoop. I also had to scrounge a spare part for 121 since I threw the original away with its sprue! As I was working, I realized for this variant, that the ventral blister, forward of the tail hook was obsolete and had to be removed. This left a big hole that I had to fill in an awkward position. Next time I will remove it before I assemble the fuselage. I carefully worked in a sheet of styrene to fill the hole and glue it in place with liberal amounts of liquid cement. |
|
) |
) |
|
With the major configuration modifications done, I started
to add the remainder of details to the fuselage. The small beaver
tail (part 118) that goes on the rudder is incorrectly identified as a
fuel dump. I think that it is a balance mass. The instructions
are vague as to its precise location, so I used my references to place it.
The actually fuel dump is molded in its correct location behind the tail
hook. Since it is molded to both halves of the fuselage, it requires
a good deal of clean up. Ideally it should be hollow, not solid as
depicted in the kit. The fit of the refueling probe is fair at best
and required a lot of fitting to get it to angle off to the right and
still stand up at the proper angle to horizontal. The wingtip lights
are molded to the wing, so using the raised lines as a guide I filed a
notch and glued in clear sprue, which I faired into the wing. These
would later be clear coated red and green after the flat coat was applied. The kit landing gear is quite detailed and realistic looking. However this realism stops at the top of the gear, deep in the well. Here, Monogram took shortcuts and simplified the gear hinge mechanism and the wheel well. You will need to spend some time here detailing for a more realistic and busy look. The main wheels are in two halves. I found that I had to sand both sides in order to close a gap between them. Overall the wheels are nicely molded with raised lettering on the tires. I opted to use the kit under-wing stores configuration. The drop tanks, once assembled, go on the inboard wing pylons. They required careful sanding to keep them round in cross section. The electronic surveillance and countermeasures pods are not accurate out of the box. The centerline pod is off in shape and a bit short, but I decided use it as is anyway. The two outboard pods were improved by adding raised dielectric panels, made from .02-styrene strip. These were glued where the antennas are locating but molded flush on the kit pod. I improved all three pods by bending the blades on the generator propellers to a more realistic angle. The other modification I made was to make wedges for the outboard pylons. The real ones hook to the pylon and give the pod a better nose down aspect. The pod hooks onto the wedge. I made these from .125 styrene strip by gluing them to the pylon and then using the pylon as a handgrip to sand the styrene to the proper wedge shape, which I pre-marked on the plastic. Painting and Markings The modern Prowler scheme is a three-tone camouflage, which with low-vis markings is a bit drab. On the real aircraft, after a period of operations with numerous touchups and dirt ground in it is hard to discern the three-tone effect. I tried to keep my plane somewhat clean, but not too clean. Both the Aeromaster and Superscale painting instruction for the low-vis Prowlers correctly call out the colors for the camouflage and the pattern. The colors are as follows: Underside – Light Ghost Gray (FS 36375) Topside – Dark Ghost Gray (FS 36320) Topside, cockpit area and wing leading edge – Medium Gray (FS 35237) Before painting I masked the canopy and wingtip lights with Gunze Sanyo Liquid Mask. I pre-shaded the panel lines with Euro I gray. I then worked from lightest to darkest being careful to over spray but not obliterate the pre-shaded panel lines. After spraying the underside light ghost gray I let the paint cure for several days. I also used this coat to check the finish for flaws and ended up re-spraying several areas underneath. Before spraying the upper and side surfaces Dark Ghost Gray, I masked the underside of the horizontal stabilators. The boundary between the colors was sprayed free hand. After a day, I sprayed the Medium Gray, trying to keep the patterns more or less uniform on each side. I then masked and sprayed the wheel-wells, gear doors and landing gear flat Insignia White. Finally, I prepped the model for decals by spraying it with a coat of Future Floor Wax, straight from the bottle. |
|
) |
) |
| The decals came from Superscale 48-307. This provided the basic markings and stenciling. As mentioned earlier the model carries no squadron unique markings. The sheet provides enough decals for two complete models with three schemes represented. The remainder will go on another Prowler for the display. The Superscale sheet does not include formation light strips, so I “borrowed” the older (non-night vision) strips from my Two Bobs Hard Corps Harrier decal. The decals set without problem and I used Micro Sol to help them settle into recesses and over panel lines. The sheet provides the non-skid walkways for the dorsal area of the fuselage. I made the wing root non-skid from a Gunship Gray (FS 36118) solid color decal sheet. The flight crew names I printed on a standard black printing laser printer. The decals were then sealed with Future. | |
) |
) |
|
I gave the plane a wash of Euro I Gray enamel (FS 36081) to
further bring out details and recesses. I went over the panel lines
with Number 2 pencil and then softened their edges with a facial tissue.
Once the wash was removed to my satisfaction, I applied a flat coat with
Testor’s Enamel Dullcoat. Then I painted the engine exhausts,
refueling probe and flare/chaff launchers. The landing gear and under wing stores got a similar treatment. I painted the landing gear and the gear doors and wheel hubs white. Once cured, I brush painted the door edges insignia red. I sealed them with future when I sprayed the plane and gave them the same wash. Final Assembly I used CA to make the final assembly. I added the landing gear first, then the gear doors and finally the under-wing stores. Since I removed the armor near the main wheel well, I didn’t need the hinges on the aft set of gear doors, so I clipped them off. The drop tanks and pods I attached with thin brass wire drilled into the sway braces to ensure that these components would not be jarred loose in handling. I also worked carefully to ensure that the stores were parallel. |
|
|
|
|
| I used the kits clear parts for the landing light in the nose wheel, the anti-collision lights and the refueling light by the refueling probe. I coated the latter and the anti-collision lights with Tamiya clear red and used clear green for the starboard wingtip light. I fashioned a clear tail light from clear sprue. | |
|
|
|
|
Conclusions The Revell-Monogram Prowler is not an effortless build, but neither is it that difficult. I was actually quite surprised with how well this big kit goes together, especially the cockpit. The raised panel lines and armor panels are unfortunate, but can be dealt with some effort. I know that aftermarket sets are available to correct the exterior problems, but they are unnecessary with a little modeling effort. I do recommend an aftermarket wing-fold set or flaps and slats, if you want some variety; both of these modifications are major challenges. Also, a replacement cockpit is a must if you want a later variant. Overall it’s an impressively big model that faithfully captures the unconventional look of the Prowler. Thanks to IPMS and Revell Monogram for the review opportunity. And if you get a chance stop by and see it at the Hampton Air and Space Museum. |
|
) |
) |
|
Information, images, and all other items placed electronically on this site are the intellectual property of IPMS/USA ®. |
|
)
)
)
)