|
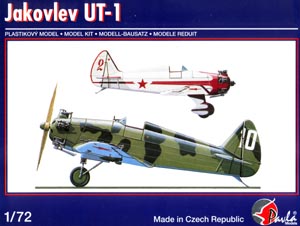
Pavla 1/72 Yakovlev UT-1/1B |
|
|
Kit Number 72034 |
|
|
Reviewed By Brian R. Baker, #43146 |
|
|
|
|
|
MSRP: $19.98 USD HISTORY: Designed by Yakovlev’s Design Bureau (OKB) by a team led by K.V. Sinelscikov, the UT-1 was a single seat advanced trainer intended for training fighter pilots. Appearing first in 1936, the original prototype, powered by a 100 hp. M-11 five cylinder radial, was a cantilever low wing, open cockpit, single seat monoplane of mixed construction. Landing gear was fixed, and a tailskid was mounted underneath the tail unit. Production for the Army soon followed, only with a 150 hp. M-11L radial replacing the original engine. A few were used for racing, but most were issued to fighter pilot training schools. Some were also appropriated by high ranking officers for personal use, as from the looks of the airplane, it HAD to be a lot of fun to fly. I wouldn’t be surprised to see homebuilders constructing flying replicas, as a Kinner radial would be just the engine for an American replica version. During the war, about 25 were converted by a naval pilot training school for nocturnal intruder missions by the Black Sea Fleet. These were armed with two ShKAS 7.62 mm. machine guns in exposed mounts above the wings, and racks for four RS-82 rockets underneath the wings on rail mounts. A later variant, with a different rudder, was designated UT-1.02. One of this type is preserved in Yakovlev’s factory museum. REFERENCES: The kit provides a considerable amount of information on this aircraft, which, frankly, I had not heard of before. I suspect that the internet would also be a source of information, but the type does not appear in any standard references. I know of no interior views in any source material. THE KIT: Consisting of 32 plastic parts, 17 resin castings, and two vacuformed windshields, the kit is apparently accurate in outline, and the fine details are impressive. The resin cockpit consists of a finely detailed seat and controls, but no side panel detail. The engine is a little gem, with detailed rocker arm covers, exhaust manifolds, and stacks, all of which fit in a resin nose cowling. Two fuselages are provided, one for the standard version and one for the UT-1.02 with enlarged rudder. Actually, four basic configurations can be built from this kit, so there is plenty of variety available.
DECALS: Decals are provided for four aircraft as described above. The armed versions had only under wing stars and tail numbers, while the “Officers Only” version is painted white and red. ASSEMBLY: The kit has minimal flash to be removed, even on the resin parts. The cockpit interior, nicely done in resin, consists of a floor, seat, rear bulkhead, stick, instrument panel, and metal rudder pedals. Two instrument panels are provided, one for the UT-1 and one for the UT-1.02 version. The instructions are VERY clear on which panel goes with which airplane. The panel needs to be painted and detailed. I put a drop of white glue over each instrument to simulate the glass facing, although the panel is hard to see once the fuselage is assembled. After interior details were taken care of, the fuselage was assembled. Minimal filler is needed, but the seams do need to be eliminated. The three piece wing should be assembled next, and attached to the fuselage. The fit is tight, and some filing is required to achieve the proper dihedral angle. Some filling is required here, as there is a sink hole just ahead of the seam at the trailing edge of the wing root. The horizontal tail units butt mount on the rear fuselage, but this is a no-brainer, as the stubs are very evident. Depending on the type of landing gear being installed, the sub mounts or the landing gear fairings can then be attached to the underside of the wings in clearly marked positions. At this point, the airframe should be painted, after suitably masking off the cockpit interior. Then the rest of the landing gear can be installed, but the instructions are so clear that this should present no difficulty for any modeler. The engine, after painting, should be installed inside the nose cowling before attaching the unit to the front of the fuselage ahead of the firewall. I needed to enlarge the crankshaft opening in the cowling so I could attach a crankshaft to the prop. The exhaust stacks are provided, but I replaced these with plastic tubing, although the bottom stacks, which serve the bottom two cylinders, were usable. A small spinner was provided for the prop hub, but mine disappeared somewhere, so I did not have it to install. It has to be the smallest piece in the kit, not much bigger than the hear of a pin. It now probably languishes somewhere in my carpet, hopefully to be found eons later by some mini-archaeologist. The armament is provided, mainly in resin form, and just the basics are provided. Extra details are illustrated in the instructions, but I just improvised the mounts, as they are VERY small in this scale. They would have to be scratch built under a large magnifying glass. The same goes for the ski landing gear. Although the skis are provided, the mounts to attach the skis to the landing gear strut are not, so you’re expected to scratch build these. PAINTING AND FINISHING: Obviously, the airframe needs to be painted before the details are added. The white and red model requires a lot of masking, but the camouflaged version is relatively simple to paint, with a coat of underside light blue and topside green. Some black pattern striping is also included on the night attack versions, but this can be done with any good airbrush without masking. Decal information is provided in detailed drawings, so you just have to choose your airplane and start painting and masking before applying decals. The decals in my kit were useful, and I had a lot left over. RECOMMENDATIONS: This kit is of a seldom modeled airplane, and should be in any collection of World War II Russian aircraft. Get at least two of these. Highly recommended. |
|
) |
) |
) |
) |
|
|
|
|
Information, images, and all other items placed electronically on this site are the intellectual property of IPMS/USA ®. |
|
)
)