|
PJ Productions
Kit Number 721021
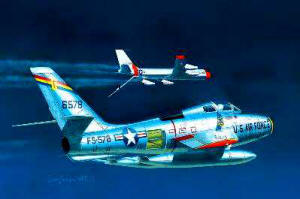
1/72 F-84F |
Reviewed By Jim Pearsall, #2209 |
 |
|
MSRP: 39 Euros
www.pjproduction.net The Aircraft To begin with, I have a
soft spot in my heart for the F-84F. I worked on the radios for the “hog” at the 182nd FG in Peoria, Illinois. But
my real impression of the plane was at my first summer camp in Alpena, Michigan in 1967. We were driving back from
town on a warm day (for Michigan), and an F-84 took off, horsed back on the stick, and cleared the chain link fence
by about 10 feet. He then leveled off, built up some speed and managed to clear the tree line about ½ mile off the
end of the runway. I could see the treetops sway as he cleared them. OK, a fully loaded F-84F on a warm day could
probably make the pilot earn every nickel of his flight pay. But no talk of low-performance. The F-84F would go
supersonic, albeit needing a 5 degree dive to do so. Republic did get the fuselage shape right, just not enough
engine and no afterburner to go mach in level flight. The F-84F didn’t have a long career in the USAF. The
Thunderbirds had F-84Fs about the time they moved from Luke to Nellis. The Air Guard and MAP (Mutual Assistance
Pact) countries got F-84s, Germany, France, Belgium, the Netherlands, Greece, Turkey, and Italy. So there are color
schemes out there. The Italian Air Force demonstration team Getti Tonanti (Thunder Jets) used F-84s, and that’s a
colorful scheme. Some day I want to do a French F-84, as they used them in combat during the Suez Crisis in 1956,
the only air force to use the F-84F in combat. The Kit I’ve never done a complete multi-media kit without
ANY styrene in it before. So I’m breaking some new ground here. But it turns out the country is beautiful. I have
never seen so many finely done parts in a 1/72 kit. The only problem I had was with the post office. There were
several parts which had separated from the pour sprues. Turned out this was actually a good thing, as the fine
parts which didn’t separate wound up being broken with a collision with the box. That’s the bad news. The good
news is that all the parts I needed for the particular aircraft I built came through in super shape. Which leads me
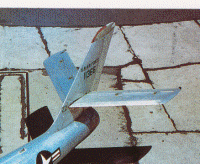
to the really neat part of this kit. You can build almost every version of the fighter F-84F from this kit. It has
2 different tails (short & tall), and 3 ejection seats (early, late, Luftwaffe). The only thing missing is the
“split tail” horizontal stab. When I called my former NCOIC, he reminded me that 19313, the F-84F on display at
Greater Peoria Airport is a “split tail”. Right, but I was hoping he’d tell me he remembered grey painted F-84Fs.
Nope, natural aluminum or camouflage. But I digress. |
 |
 |
 |
| I’ve included drawings and a photo.
The Late F-84F (the kit stab) was an “all flying” tail. No split for the stabilizer and the elevators. The early
F-84Fs had hinges and a split there. It shouldn’t be a huge task to sand off the panel lines and scribe a hinge
there. Just watch the hinge points. I was also quite taken with the quality of the moldings and the detail. The
one-piece wings were so thin you could see the main landing gear wells from the top if it was back lighted. The
panel lines are so fine and line up so nicely that I just had to marvel at the level of surface detail on this kit.
Separating the parts from the sprue was never a problem I used a photo-etch saw I bought from Squadron about 6
months ago, and it was really easy. The saw is very thin and has super fine teeth, so it makes a very fine and
clean cut, but also, the parts connection is well delineated, and it’s easy to get the parts off the sprue without
damage, and without a lot of follow up to clean off the connection point. Assembly It happens that Fine
Scale Modeler did an article on building better resin kits recently. So I took their advice and looked all over the
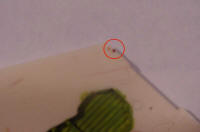
kit parts for those nasty little pin holes in the resin which must be filled and sanded before much else can be
done. Well, here it is. One. On the bottom of the wing, near the wing root. |
 |
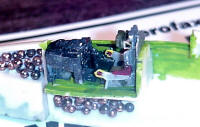
| The interior went together nicely. I
painted it per the instructions and a couple of interior photos I found on the internet. Looks super. When I
installed the cockpit and nose well in the fuselage, I realized there would have to be weight in the nose area, and
there isn’t much room in there. I used copper birdshot and Elmer’s glue . The kit sits nicely on its gear. |
 |
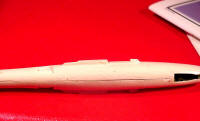
| My first real problem came when I
started assembling the fuselage halves. There was some warp. Fortunately I was able to overcome this without
resorting to hot water, steam or a hair dryer. Just gluing the front section, then the center then the rear and
clamping after each glue session resulted in a nice clean seam which required minimal sanding and filling. |
 |
 |
Then it was just
the basic stuff. Because there are two selections for vertical stabilizer, they come as separate parts. I was able
to assemble the horizontal and vertical stabs as an assembly, and put them on after I put the wings on the fuselage.
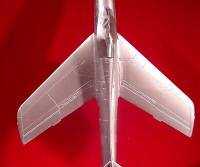
Although I have done the Airfix and Italeri F-84Fs, I didn’t recognize or remember that the F-84F has a 3 ½ degree
anhedral on the wings. This is clearly shown on the instructions, and that’s how I built it. That was the
epiphany, that moment when something suddenly becomes crystal clear. OK! No wonder Dennis always had me carry the
radio to the wingtip to hand it down to him. The wingtip is about a foot closer to the ground than the wing root!
And since the ARC-33 weighed about 40 pounds, that was a concern. The metal landing gear went
together nicely, and the gear doors were the easiest to assemble of any F-84 I’ve built, even Monogram’s very good
1/48 kit. The canopy worried me at first. It’s a vac-form, and I’ve had problems with vac
canopies before. Especially since I wanted to build this one open, to show the really neat opening mechanism. But
since there were 2 canopies provided, I went ahead. I could always build the second one closed if I botch the first
one. I used modeling clay to stiffen the canopy when I cut it, and that worked fine. The clay left a greasy film
on the inside, but that washed out with dish soap. That week there was a tip on Hyperscale about
using Blu-Tak, a reusable stuff that’s used to stick papers to walls, etc. And 2 days later the admin manager at
work was going to throw out a pack of Blu-Tak, which I took. Ah well, better late than never. I
used Humbrol clear parts cement to put the various canopy parts on. I picked this cement up in Italy in the
mid-90s. It’s a fine product. I left the canopy off until I had finished the decals, as I was sure I’d knock off
the raised section while handling. I used only the 450 gallon drop tanks. The word in the squadron was that the
outer wing tanks had only a marginal increase in range, and put takeoff weight up to where the pilot was really
worried about clearing that chain link fence. Painting and Markings
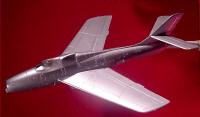
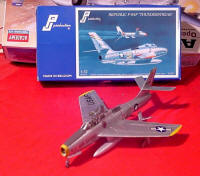
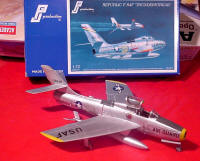
The finish was not a big problem. Since the 84 I was doing sat outdoors from when it was built in 1953 until I got
to it in 1966, the aluminum was by no means shiny. So I used Testors non buffing Aluminum Metalizer. It doesn’t
give a polished aluminum finish, but that’s what I was after. |
 |
 |
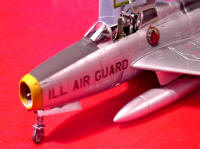
| The
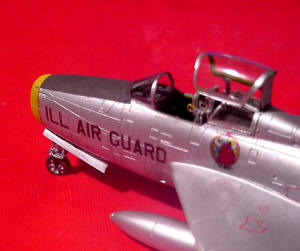
nose ring and wingtips were yellow because the 169th FG “color” in P-51s was bronze, and this carried
over to the F-84s. I now prepared for another new and exciting addition to my modeling skills. Home-made decals.
|
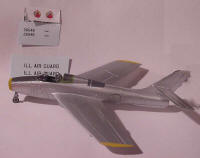 |
The ILL AIR GUARD was not particularly difficult. I downloaded the font and
printed it. I played with the image size. Using Paint Shop Pro, I worked with it until it was the size I wanted. I
also did the same with the aircraft serial. The decals were done on “laser printer” clear decal film from Bare
Metal. The printing, however, was done on an office copier. Works exactly like a laser printer. The unit insignia
was a little tougher. I downloaded it from the 182 AW web site, but had to change the text below the Indian to
“PEORIA”. Again, Paint Shop Pro is my friend. This time it was white background on an ink-jet printer. No color
laser printers in my office. |
|
 |
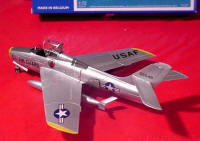
I used the kit decals for the
national markings and all the other details. They went on beautifully. The film is not heavy, but is also capable
of some stretching to fit contours. The decal sheets (there are 2 included) have markings for a USAF aircraft, an
Italian, a German and a Suez Crisis French AF. A light mist of Future to blend them, without bringing up a high
shine, add the canopy, and it was done! Overall Assessment The finished
model is a true beauty. I was really proud to take it to the local Chapter meeting. |
 |
 |
 |
 |
 |
It isn’t cheap, it isn’t easy
to build, but this kit is so nice that it’s certainly worth the extra labor. The level of detail on this kit and
the nice way it’s engineered make it a super addition to anyone who wants to do the “nifty fifties” jets. I thought
the fuselage detail and the main gear wells were superb. Outline was dead on with the drawings, and the thing
really has the correct look. |
Information, images, and all
other items placed electronically on this site are the intellectual
property of IPMS/USA ®.
|
| |