|
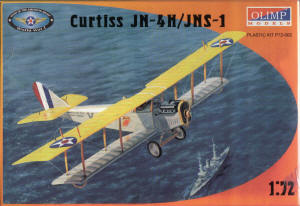
Olimp Models Kit Number 1/72 Jenny JN-4H/JNS-1 |
|
Reviewed By Mark Andrews, #33206 |
|
|
|
The Jenny is possibly the most recognized biplane ever
built. This is Olimpĺs second offering in their line of five Jenny
kits. This kit can be built one of two ways. Either the early
JN-4H from the US Navy in Miami in 1922. Or the later JNS-1 standard
USAAC finish in 1927. This kit was completed in the JN-4H
configuration. On opening the box you will find 106 parts on 3 sprues. Many parts are duplicated, but that could come in handy if you break any of the tiny struts or braces. Twenty-one (21) of the parts are not used for either one of these versions. Most of the Jenny releases will use all the same sprues. Most of the parts are flash free and nicely molded. Some details are soft but very workable. The super-detailers will have many opportunities for improvements to the kit with rigging, cockpit detailing and engine details. I have built this kit strictly out of the box to see what can be done that way. Upon starting construction, the first thing noticed is that the cockpit and engine are both very basic but well molded. This is where extra detailing would be needed. Especially since that engine sits out in the open where it is seen easily. For either version built in this kit, the forward fuselage section has to be cut off and the new one grafted on. The one needed has a much more rounded bottom that the molded on one. There are scribe lines on the inside of the fuselage halves. A few quick swipes with a sharp X-Acto blade did the trick. Lining up the new parts was a bit of a hassle. Mine did not line up correctly and I had a gap in the right half. I filled that with some thin strip stock and puttied the rest in. When I put the cockpit in and tried to join the halves, the floor had to be filed down quite a bit for the halves to go together. Some putty was needed in the seams on the fuselage. You are instructed to install the engine in step 3, but I left mine out until after painting. The wings are separated into three sections each and they do not have any pins or tongue and groove guides. They are best assembled on a flat board with liquid cement drawn in the butt joints. The resulting gaps will have to be filled also. Here is the fun part, installing the wings and all those struts! I attached the lower wing to the fuselage and then installed all the struts to the bottom of the upper wing before cementing it to the lower wing. This was not easy, but it was the lesser of many hassles. All that remained was attaching the landing gear, engine and prop. All of those went on without incident. I painted the fuselage, lower wing and the bottom surface to the upper wing and tail plane with Testors Light Aircraft Gray. The upper wings and tail plane were painted with Testors Model Master Chrome Yellow. The engine was painted with Testors Steel and then dry brushed with Chrome Silver and black washed. Overall this is a nice kit with decent detail. These kits from Olimp are a much needed subject that has been long overdue in the coming. The super-detailers will have lots of challenges with all the rigging that the Jennies had and the cockpit and engine details. I highly recommend this kit if you have had at least minimal experience with a bi-plane before. |
|
Information, images, and all other items placed electronically on this site are the intellectual property of IPMS/USA «. |