|
Monogram Kit Number 85-5970 ProModeler 1/48 Ju-88C-6 Night Fighter |
|
|
Reviewed By Paul Bradley, #35554 |
|
|
|
|
|
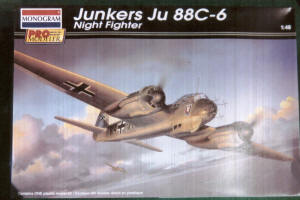
MSRP: $43.98 USD History The Ju88 was one of the most versatile of World War II combat aircraft, with over 100 different prototypes being produced for various roles. With the RAF conducting more night bombing of the Reich from mid-1940, there was a requirement for a specialist night fighter, and given the size of early radar sets, the Ju88 with its combination of size, payload, speed and range was the obvious choice for the role. A total of nearly 4000 of the C-model Ju88 were produced in the night fighter and heavy fighter roles. First Look With the forthcoming release by Dragon of this same kit, I thought it relevant to look at last year’s release of this kit by ProModeler. The box has some impressive artwork of a brace of Ju88s flying over the sea at sunrise/sunset. I wish Revell-Monogram wouldn’t bleed the logo and blurb onto their artwork as many of them are good enough to frame. The kit nicely fills the box, with a total of 13 sprues of soft, light gray plastic with 4 sprues of clear parts. Many parts are not used and will be useful additions to the spares box. This kit is a release of the basic Dragon moldings, with a new sprue for the nose, guns and Lichtenstein radar. Dragon has released a series of Ju88 kits from these same basic moldings, and the kit is broken down into many sub-assemblies to accommodate the different variants. The cockpit area and vertical tail are separate sub-assemblies, as are the wingtips and engine nacelles. This causes fit problems that I will elaborate on later. |
|
 |
 |
|
The instruction booklet is typical ProModeler with 16 pages of pictograms, with useful color callouts and helpful hints. There are no
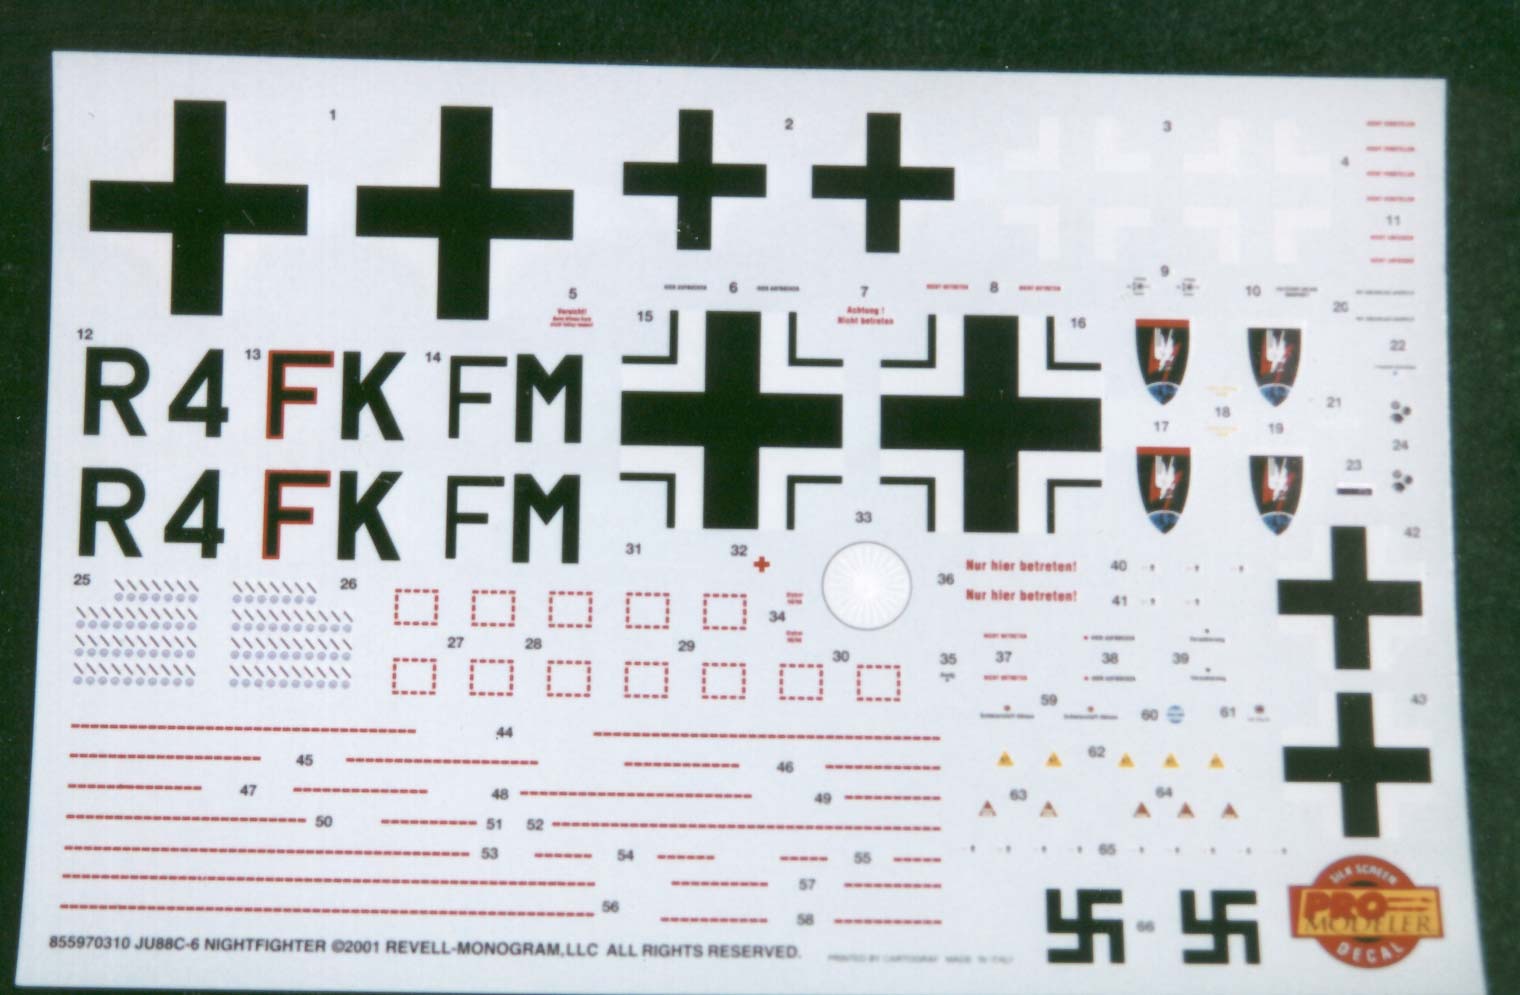
photos, and one wonders why ProModeler stopped including them, they were a useful feature of their early releases. The decal sheet,
like most Luftwaffe kits, is small, but this one includes much useful stenciling and has two options. More on that later. Cockpit As usual, I began with the cockpit. This stage of assembly takes up the first two pages of the instruction booklet; not surprising, as there are 32 parts to assemble here. The seats are a little crude. I thinned the sides and backs, and I added some photo-etched belts to make them more believable. The radio suite is nicely detailed and repays careful painting. I only used the starboard ammunition box, as this version of the Ju88 had only one rear-firing machine gun. This was painted steel, and a photo-etched ammo belt was used to connect it to the machine gun. A cutaway drawing of the Ju88G suggested that the radar screen was positioned in place of the port ammo box, so I used some license and added one to this C-model Nightfighter. There are six sets of control knobs for the port cockpit sidewall, but my references didn’t match them all up to real controls. I eliminated the rear pair and painted the others RLM 66 with white knobs. The rudder pedals are nice, and all I added were some straps made from masking tape. The starboard sidewall features the oxygen equipment and some control panels, while the instrument panel is excellent. Be careful, as there is a second panel in amongst the pieces, which is presumably representative of the bomber versions. The last item to be added was a mysterious two-piece box between the rudder pedals, which I think might be an ammo box for the nose guns. Whatever it is, it isn’t that visible once the model is complete. The cockpit was painted RLM 66 overall, with steel for the ammo boxes, blue for the oxygen system and various colors for the different instruments and controls. Washes and dry brushing gave the illusion of depth. All this detail fits into the cockpit halves. ProModeler suggest that you join the two cockpit halves at this time and I did so. In retrospect, it might have been better to join the cockpit halves to their respective fuselage halves, as then you can deal with the poor fit of nose to fuselage before attaching other sub-assemblies. Main Airframe While the cockpit was set aside to dry, I started on the fuselage proper. Assembly of the two halves is complicated by the lack of positive locating tabs. I had to use quite a bit of filler and spent some time filing and sanding to achieve suitable joins here. I would recommend that you add some plasticard tabs to help with fuselage alignment. ProModeler would have you add the tailwheel assembly and the DF aerial and cover at this point, but I saved these for later, as they can both be fitted after major airframe painting. The cockpit section was an indifferent fit, but through the judicious use of filing, filling and sanding, was made to blend into the fuselage. Then onto the vertical tail, and it was here that I discovered a major error by the mold maker. The rudder hinge line is supposed to be straight from the bottom of the mass balance to the bottom of the rudder. However, the kit as molded features a kink at the bottom of the rudder, and a curved end to the fuselage where it should be straight. I sanded the rear of the fuselage flat, and added a piece of 40 thou plasticard to the fuselage side of the rudder. This was trimmed, filled and sanded to shape to give the appropriate straight line to the rudder hinge line. Once this was done, I glued the tail to the fuselage, taking care to align it vertically. The fit was indifferent and I needed some filler to properly blend the two. |
|
) |
) |
) |
|
|
Next up are the engine nacelles. These are handed and I would recommend labeling them so you don’t attach them to the wrong wings!
Some filler was needed here too. The nacelles feature clear plugs that represent the engine instruments. Be careful to fit these
plugs on the correct sides of the nacelles, so that they face the pilot. As mentioned earlier, the wings have separate wingtips and these do not fit at all well. As molded, the port wing tip will be too thick, while its partner to starboard will be too thin. In addition, both are a little off in chord. I sanded down the insides of the port tip before gluing it to the wing. The starboard halves I glued to the wing halves, filling and sanding after constructing the wing. Neither port nor starboard tips fit that well to the wings, there being a large gap at the join on the starboard wing. As for the chord problem, I made careful use of a sanding stick to even out the problem. The ailerons were fitted without too much trouble, but I left the hinges off at this stage. Interestingly, only the port aileron has a trim tab molded in, you will have to scribe the starboard one. Attention turns now to the undercarriage. Each bay is assembled outside of the wing and slots into place later in construction. The undercarriage legs are three-piece units, which seems to me to be unnecessarily complex when a single piece would have sufficed. All it seems to do is add another set of seams to clean up. The detailing is nothing special; I added brake lines and reamed out the holes in the scissor links. The whole assembly is painted RLM 02, with RLM 66 oleo boots and once again, the whole was washed and dry brushed for depth. ProModeler suggest fitting these to the wings at this stage, but once again, I left them off for now, to save possible breakage. At this stage, the wings can be attached to the fuselage; however, all is not well here. The top and bottom of each fuselage wing root have bumps that are not prototypical, and do not carry over to the wings themselves. I removed these. Also, when I dry fit the wings to the fuselage, I noticed that the fuselage wing roots were too deep for the wings, which would result in an unsightly step if uncorrected. I had to carve and sand the wing roots down to a reasonable depth, but I still needed some filler to blend the wings to the fuselage. Also, the actual join is less than perfect, which means more filler. At least the dihedral is correct! Once the wings were firmly attached, I glued the horizontal tail to the fuselage. Once again, the joins were not perfect and required some filler and sanding to blend them in. Under the fuselage center section, a panel needs to be fitted, this being a substitute for the A-model’s bomb bay doors. This also required filler - do you detect a pattern here? With all the sanding of the fuselage/wing joins complete, I added the undercarriage assemblies, making sure that port matched port and starboard to starboard. These simply slot into the wings. The undercarriage doors and wheels were set aside for later attachment. Now I was able to fix each engine pod in place. These also required filler. Be sure that the engines are horizontal; they should not feature dihedral! Returning to the fuselage, I added the lower nose section, which replaces some of the glazing of the A-model. A small side panel fixes to this and represents the cartridge ejection slots. I reamed out the slots with a rotary tool and attached it to the fuselage. Neither part was a good fit and needed filler to blend them in. The gondola is a four -part affair, all molded in clear plastic. In theory, this can be left open; indeed, ProModeler include a boarding ladder for that contingency. However, you would need to detail the hinges, the interior of the opening and the fuselage, and add a pair of cannon plus the ammo boxes for said. Not really having the time to do this, I decided that discretion was the better part of valor, and left the gondola closed. What I did do was to slice off the inadequate moldings for the gondola’s cannon barrels, reamed out the barrel housings, and replaced the kit barrels with fine metal tubing. The interior of the gondola was painted RLM 66, leaving the windows clear of course, and white glued into place. I added the guns into the nosepiece then glued it into place, minus antennae, and carefully sanded it to blend into the contours of the fuselage. The basic airframe was now complete and was primed to show up any blemishes or mistakes. Once these were corrected, it was time to paint. Painting Herein lies a tale, for ProModeler are up to their old tricks! They seem to have become famous for their rather fanciful interpretation of black and white photos. The two color schemes offered in this kit are not without potential problems, though the thorny subject of Luftwaffe color schemes is not an area about which I can claim to be an expert! The first option is a Ju88C-6b of NJG-2, based in Holland in 1942. The pilot is claimed to be Helmut Lent, although according to Nachtjager experts, Lent didn’t fly Ju88C’s, only G’s. Aside from this, the color scheme itself is open to question, as ProModeler would have you paint the aircraft in overall RLM 02 Gray with broad camouflaging with RLM 74 Gray. The more normal schemes at this time were overall black or RLM 70/71 Greens over RLM 65 Light Blue. Now this could have been an experimental scheme, though none of the experts I consulted had definitive proof of this scheme. This leaves too much doubt in my mind to opt for this choice. Turning to the second option, this is claimed to be a Ju88C-6b of 2./NJG2, based in Sicily, in early 1942. This scheme is labeled as RLM 71 Green over RLM 76 Gray, with large swathes of RLM 79 Sand over the top surfaces. Swastikas are noticeable by their absence. In addition, the spinners and nose feature squiggles of Sand over the Green. Now this scheme seems to have more basis in fact, according to my sources, so I opted for this scheme. For those of you who are not constrained by the need to use the kit decals, you may wish to use one of the aftermarket decal sheets with probably more accurate schemes. Fiddly Bits Production now turns to the “fiddly bits,” those dangly parts that more often than not are fragile and easily dislodged. The cockpit canopies were added, along with the rear firing machine gun. The fit of these parts is very good, with just a smidgen of white glue to cover a seam beneath the windscreen. As this is a night fighter, the nose features a set of Liechtenstein radar. I have some reservations about the configuration of these as molded; they don’t seem to match the photos I have seen of these distinctive antennae. Although the mold makers have made the pieces about as fine as you can realistically manage with the injection-molding process, they are still over scale and this is very noticeable on the finished model. The truly dedicated may wish to replace them with stretched sprue. The ventral blind approach aerial is depicted as a streamlined fairing, not something I have seen in any photos of any Luftwaffe aircraft equipped with this device, though it might be correct. Next were the propellers. Each unit comprises a separate hub, blades and spinner, and these can be made to rotate with a sleeve and retainer. I left the spinners off for painting and the propellers were also set aside while I finished attaching various parts to the fuselage. Atop the canopy is a tall antenna, which is connected to the tail by a fine fishing line to represent the aerial. Below the port fuselage is another antenna, and protruding from the port wing is a long pitot tube. And that is basically it. Decaling What a delight this stage was! ProModeler/Revell/Monogram decals are “like a box of chocolates.” I have had reason to complain about some of their offerings, but the ones included in this kit are the crčme-de-la-crčme. Printed by Cartograf, they are thin, opaque and in register. Included is a full set of stencil markings, and swastikas for one of the offered schemes. The decals detached from the backing paper in a minimum of time, and adhered well to the model. Seldom have I been this pleased with kit decals! There was a tiny amount of silvering on the national insignia, but that was my fault for not properly glossing the surface. After a final varnish coat, the model was finished and ready to sit on the shelf, with my collection of other WWII twins. Conclusion This is not a “fall together” kit. I know and understand all the arguments about “we are modelers, not constructors” and “we should be grateful for this kit,” but I can’t help being disappointed by the fit of this kit. I build and enjoy old Airfix kits and I know what to expect from them, but this is a “new” release and certainly not what I expected. Too much time was spent filling and sanding for me to like this kit. The number of sub-assemblies is the problem, and although I understand that Dragon want to get their money’s worth from the molds, this is one instance where less would have been more. Aside from the fit, the schemes offered are suspect and I wish that ProModeler would include photos or references for their chosen subjects so that we could make up our own minds! I really do enjoy researching my models, but in this case it was time-consuming and inconclusive. If I were to do another, I would invest in a specialist reference and an aftermarket decal sheet. On the plus side, this makes an imposing model. As I am not a so-called “rivet-counter” I did not measure the model or place it over plans, but I did compare it to photos and study plans for panel lines and details. The outline is (aside from the rudder hinge line) good, the detail is (for the most part) fine and the decals are splendid. It looks the part and has the characteristically stalky Ju88 stance. Although I have not seen the Dragon release, I expect that the moldings will be the same, and so the same points will apply. Of course, they are likely to have different decals and it will be interesting to see which color schemes they opt for. Overall, I can reservedly recommend this kit. It isn’t for beginners, but for those who want a Luftwaffe night fighter kit, this is certainly worth looking at. My thanks to ProModeler for donating the sample kit. |
|
|
|
|
|
Information, images, and all other items placed electronically on this site are the intellectual property of IPMS/USA ®. |
|
)
)