|
Revell-Monogram
1/48 |
|
Kit Number 5306
|
|
Reviewed By Charles Landrum, #26328 |
|
|
|
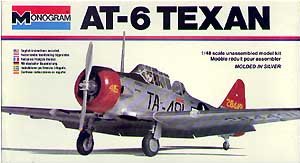
MSRP: $12.98 USD Review kit provided by Revell-Monogram. Aftermarket Decals Used: Belcher Bits SNJ's with resin tail. There is
no need to introduce the T-6/SNJ Texan. Borne in the late 1930s it was the most common trainer of the US armed forces and of
many other nations. It was also pressed into the role of VIP transport, forward air controller and counter insurgency.
Later it filled in, with much modification, as a variety of Japanese WWII aircraft. Today the plane is a common site at air
shows and still provides many enthusiasts the opportunity to fly a ďwarbirdĒ. The Kit The T-6 Texan kit is one of the better
kits produced by Monogram. It is well detailed, and the fit is superior. The cockpit is a nice representation of the
tubular framework common to the planeís 1930ís origins; all of the flight controls are included. The engine is equally as
detailed. As for the exterior, it is detailed with finely raised panel lines and rivet detail. While many modelers
prefer recessed panel lines for ease of weathering, in this case the raised detail is prototypical. If you want to build a T-6
or SNJ (US Navy designation), this kit is a faithful reproduction. Monogram made the molds resilient, capable of reproducing most
of the later variants from T-6D through T-6G. This kit has been in and out of production over the years and in several variations.
Depending on the boxing, the options were limited to the particular variant represented. For instance the Reno Racer version
was a T-6G, with a minimally framed canopy, a smooth cowl and no gun for the observerís position. This latest re-release
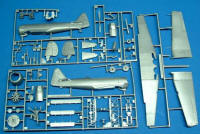
(molded and packaged in Poland), like the Revell of Germany re-release in 1998, does not blank off the optional sprues; so what you
have is a kit that allows you to build any of these model of aircraft. The options include:
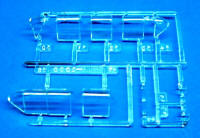
Both styles of cowling, with and without gun blister An extended exhaust pipe A nicely molded machine gun and ring for the back seat A spinner Two canopies, one with intermediate frames, and one without. The
one with the intermediate frames comes in sections. The canopy without these frames is molded in three pieces, so only
the pilotís canopy slides. Both share a common windscreen Fuselage venturi pitot-tubes Two figures
The kit is molded in silver. This is a much better color of plastic than the bright red of the Reno kit, and the yellow of
the Revell of Germany release. However, the plastic is soft, like other kits molded in Central Europe. |
 |
 |
 |
|
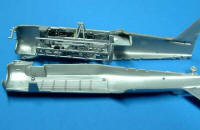
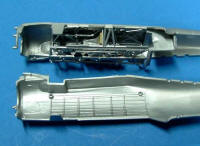
Assembly: The Interior Start with the cockpit of course and in this case it is easy to assemble. The interior comes in 12
pieces if you include the optional observers .30 cal MG and ring. The ribs and stringers are molded into the fuselage
sidewalls. With the rear seat in the position you cannot see deeper into the fuselage, so there is no need to add detail back
there. The tubular frame comes in three pieces, two sides and a floor. These are molded with a nice amount of detail
representing the flight controls and observerís equipment. I found no need to add any detail. Since I was modeling a
pre-war US Navy SNJ, the interior needed to be painted aluminum. Also since my model is an Admiralís plane, I left out the
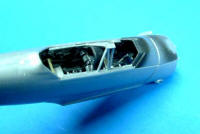
rear gun and ring and cut away the ammo magazines molded to the rear bulkhead. Before assembly I airbrushed the fuselage interior
and frames Floquil Old Silver. I emphasized the ribs and stringers with a soft pencil. I hand painted and dry brushed
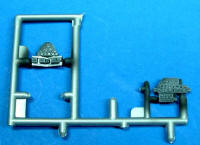
the details. Since the instruments panels have raised detail, I sprayed them flat black, dry brushed lightly with white to pick out
the instruments and added a drop of future to replicate the instrument glass. The effect is quite convincing. Assembly was
straightforward, and the fit good. I elected to leave out the pilotís and observerís instrument panels until after the
fuselage was together. However, this made assembly more difficult, and I recommend installing them as per the instructions.
I also left out the observerís seat so that I could better glue the framework to the rear bulkhead. Most Navy two-seaters had
optional controls for the observer, so that he could land the plane in an emergency. But in normal operation the rear stick
was stored on the sidewall so it would not be in the way. So I cut off the rear stick and glued it to the left frame. I
drilled a hole in the base to represent the socket in which it fits. |
 |
 |
 |
 |
|
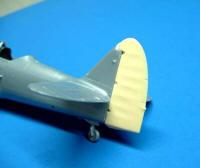
The Exterior With the cockpit together, I assembled the fuselage halves. Before doing so I removed the kit rudder in
preparation for a replacement rudder that comes with the Belcher Bits decal set. The fit of the fuselage is good, with just a
little play. Be careful in your alignment and there is little seam to clean up, which preserves the raised detail. No
filler was needed. The horizontal stabilizers required a little work to get a snug fit, but again you should end up with
minimal gaps. The Belcher Bits rudder is beautiful piece of resin, nicely shaped and cast. It is obvious that is was
patterned for the Occidental Kit in that the rudder is slightly wider than that of the Monogram kit and there is a gap at the top of
the vertical stabilizer. The difference is not noticeable. I used a scrap piece of styrene to eliminate the gap at the
top, and CA to attach the rudder. I also removed the molded detail and replaced it with strip styrene in the landing flap
well. Lastly, I attached the upper cowling with CA to leave crisp panel lines (a lesson learned from an earlier build of this
kit). |
|
 |
 |
|
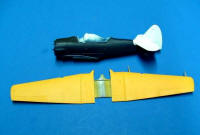
I assembled the wings beforehand so that I could pre-paint them. I had never tried this technique, but I figured that this would
make painting a lot easier. Dry-fitting the wings to the fuselage showed that the wing root joint would have minimal gap, so
the technique would work. I use Model Master Deep Yellow for the Chrome yellow, because it has more orange than MMís Chrome
Yellow and is therefore more prototypical; it dries flat, so additional coats can be done quickly. The key to success with any
yellow is a succession of light coats. The MM Chrome Yellow, by contrast, is a gloss and has a long cure time. I ensured
that the yellow color prototypically wrapped around the leading edge. I also worked on the flaps. These have awkward
ejector pin marks that I was not entirely successful correcting with filler and sanding. Fortunately, the marks are for the
most part hidden. Once the yellow paint was cured, I gave the wing a good gloss coat with Metalizer Sealer. I was then
ready to attach it to the fuselage; the underside I would paint later. I painted and assembled the fuselage assembly next.
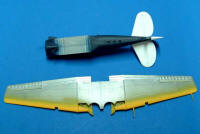
After masking the cockpit interior, I sprayed the stabilizers white. I used MM flat white and applied successive thin coats.
Once dry, I masked this area and sprayed the fuselage insignia blue, being careful not to get overspray into the front of the
fuselage. With the blue dry, I sprayed the fuselage with a gloss coat in preparation for decals. I attached the wing to the
fuselage using CA. The fit was tight, requiring no filler. I used masking tape to maintain dihedral, which also helped
to close a minor wing root gap. With the wing attached, I sprayed the underside of the control surfaces and the interior of
the flaps Floquil Old Silver. |
 |
 |
|
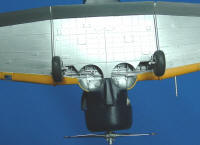
The wheel wells are a bit Spartan. I gave them a busier look by adding missing framing detail using strip styrene. I also
added hydraulic lines from .020-styrene rod and .016-brass wire. With this detailing complete I masked and sprayed the
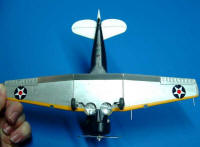
underside of the wing, the wheel wells and flaps with MM Metalizer Buffing Aluminum. Note that when I buffed out the underside
of the wing, I unintentionally highlighted the yellow and old silver over spray. I should have masked these areas, something
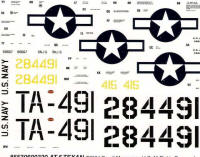
that need not be done for other colors. With the plane essentially assembled and gloss coated, it was time to add the few decals
required. The Belcher Bits Decals went on without incident. I used Solvaset to get the decals to snuggle down over the
raised detail. To replicate the non-skid areas of the wing, I decided to use a decal instead of masking and airbrushing.
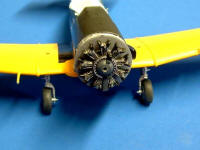
Details One of the nicer features of the Monogram is the detail of the engine. It is essentially complete including the
accessory section. Primarily it was an exercise in painting. Once the engine was painted I did add ignition wires to the
spark plugs. I used fine bead wire to do this and drilled holes into the crank case below the molded ignition harness. I
chose to leave the firewall silver. I sprayed the inside of the cowling Old Silver as well. |
|
 |
|
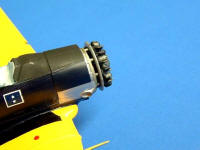
With the engine done, I prepped the fuselage for mounting the engine assembly. I masked and painted the front of the fuselage
silver. I also masked and painted the panel by the exhaust stack buff able aluminum (as was the prototype). With this
done; I brushed painted the exhaust ring MM Exhaust. Now I attached the engine and cowling. After adding the aerial mast
to dead center of the cowling just forward of the windscreen location, I masked and painted the anti-glare panel and mast flat
black. |
|
 |
|
The propeller required a little cleanup and the addition of the counterweights. Since I did not want a spinning propeller, I
replaced the shaft with styrene rod and put a small section of brass tubing into the crankcase to eliminate the excessive play in
the fit. The propeller received a coat of Buffable Aluminum, buffed out with SNJ aluminum powder for a high sheen. I
made the the warning stripes from red, insignia blue and chrome yellow decal film, cut into 1/16 strips. Solvaset helped snuggle the
decals. I glued the propeller in the 3 and 9 oíclock position, the plane inspection position. The landing gear is natural
metal. After assembly and cleanup of the tires I sprayed them flat black and dry brushed them to highlight the tread.
The landing gear is buffed aluminum with the brake lines painted black. The gear fit snugly into the wheel wells. The
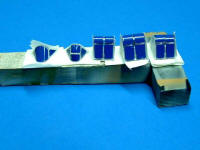
gear doors are Old Silver on the inside and Buffable Aluminum on the outside, and also fit well. Masking a complex canopy is
challenging and usually I used a liquid mask, an optivisor, a sharp no. 11 knife blade and a steady hand. This time I decided
to try the EZ mask set designed for this kit. The masks fit like a glove and were easy to apply. I used Old Silver for
the color and had no leaks under the mask. I was sold! The masks made a dreaded task a breeze. I attached the
canopy sections with white glue. Note that as designed, the canopy sections will not stack as in the prototype. Doing so
requires a replacement vacuum-formed canopy. |
|
 |
|
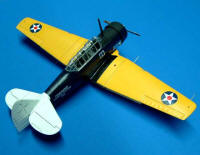
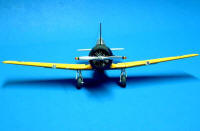
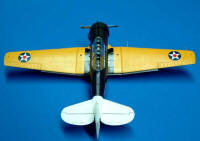
I chose to limit the weathering of my plane. After all it was an Admiralís plane and no doubt was all spit and polish. I
did emphasize some panel lines with a No. 2 pencil, but that is all. The aerial is invisible thread painted dark gray.
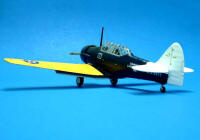
Conclusion The Monogram/Revell Monogram T-6 is an easy and enjoyable kit to build. It really requires no aftermarket
products except perhaps a canopy. A little added detail will greatly enhance an already detailed kit. With so many
operators of the aircraft, there are many colorful schemes to choose from. This is a kit well worth the time of experienced
and novice builders alike. Strongly recommended! |
 |
 |
 |
 |
 |
|
Information, images, and all
other items placed electronically on this site are the intellectual
property of IPMS/USA ģ. |
| |