|
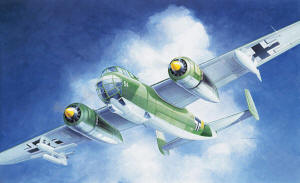
Italeri 1/72 Dornier Do-217 E-3/E-4/E-5 |
|
|
Kit Number 1250 |
|
|
Reviewed By Brian R. Baker, #43146 |
|
|
|
|
|
MSRP: $31.50 USD Notes: Revised version of 1970’s vintage DO-217J and DO-217K kits. History: The Dornier DO-217E was the first new bomber developed for the Luftwaffe bomber force at the beginning of World War II. Essentially an upgraded version of the pre-war DO-17Z bomber used in the Battle of Britain, the DO-217 was one of the major Luftwaffe bombers from about 1940 until 1943, when the Luftwaffe bomber arm began to decline after the beginning of the USAAF and RAF bomber offensive caused a shift in priorities in Hitler’s demented mind, such as it was, and fighters became the main priority in German aircraft production programs. The DO-217E was the major production version of the bomber, and it was used as a day and night bomber, as well as for maritime patrol and anti-shipping activities. DO-217’s were the first German aircraft to employ the Fritz X and the Henschel HS-193 guided bombs against Allied ships. The Kit: The Italeri DO-217E kit is actually a revised, modified version of the venerable DO-217J and K kits that came out in the 1970’s. These kits, one a night fighter and the other a bomber, had interchangeable engines, liquid cooled DB-603’s and the BMW 801 radials, so that one could build four different versions, and it was also possible with a little imagination and vacuforming experience, to do a tolerable DO-217E. I actually did this, but this kit is much better, and a lot less work. Cast in light grey plastic, the kit contains 118 parts, not all of which will be used, and 5 transparencies for the canopies, turrets, and glass enclosures. There is a trace of flash, which takes minutes to remove and fit is fair to good, requiring some but not a lot of filler. The clear plastic parts fit pretty well, and only a little filler was needed to seal the seams. Assembly Instructions: I built my kit straight from the box, and did not use any aftermarket materials or decals, nor did I do any serious detailing. I followed the fairly detailed instructions, which included a very useful sprue diagram, exploded assembly drawings, and 4 four view color schematic drawings. Information and decals are provided for four aircraft:
Assembly: The cockpit interior is VERY basic, consisting of a floor, two seats, an instrument panel, a control column and wheel, along with two braces and a seat for the rear turret. Two machine guns are provided, one for the dorsal turret and one for the ventral gun position. Several other guns are in the kit, but there is no provision for any kid of nose gun or armament. A decal is supplied for the instrument panel. A problem with the panel is the instructions are unclear as to exactly where it goes. If it goes in the place the instructions appear to indicate, it is about 2 feet too far forward in the cockpit in relation to the seats, and a pilot flying this aircraft would have to have arms like an ape to be able to reach the control wheel, thus confirming the suspicions of many ground crewmen regarding the ancestry of pilots. On the other hand, the whole cockpit assembly may be too far to the rear. I mounted the panel back in the proper position, and it looks OK. Now the pilot can reach the controls and fly the airplane. The rear turret requires a small gun mount which glues to the rear face of the interior of the turret and holds the MG-15 machine gun in position. The turret, however, when installed, looks to be just slightly too low. The MG-15’s are nicely done, and there will be several extras when you finish. The dorsal turret gunner’s seat s mounted on two mounting brackets. The unit is a lot sturdier than it looks, and goes into place before the fuselage halves are joined. There is little other cockpit detailing, even though it is quite visible once the canopy is in place. For the serious detailers, there are some good photos of the interior of a DO-217E in Profile Publications No. 26 which features the DO-217. Other information can be found in Green’s Warplanes of the Third Reich. The wings consist of two major assemblies, top and bottom. Be sure to drill out the holes for the wing racks if you intend to use them, as they are offset and will be hard to locate once the units are joined. I mounted my racks before I painted the airplane, but this was probably a mistake, as the under-wing cross goes under the rack, which was installed as operational needs required. I’ve seen drawings showing the crosses painted on the racks, but I can’t imagine at that stage of the war that Luftwaffe “Black Men” had time for such niceties, especially considering the loss rate and life expectancy of these aircraft. Incidentally, inside of the wing are a couple of slash marks at the outer panel wing join line, apparently an indication that Italeri just might issue a kit with the long wings, a late-war modification. There is a round landing light that goes into the wing before assembly, but Krystal Clear works just as well and you don’t have to mask it beforehand. The tail unit consists of 7 pieces, including the horizontal stabilizer, two fins, two rudders, and two elevators. Four tiny hinges are also provided, but these are best left to last to install after they are painted. The engines consist of the fans, cowling fronts, cowling sides, engine mount fairing, propellers, and spinners. There is an engine face there somewhere, but with the fan, it is all but invisible. A good feature is that you can mask off the cowling face and fan, and install the prop and spinner after painting. The tiny exhaust stacks are nicely done, and look very realistic when attached in their proper positions. The landing gear is rather complex, but then it was on the real airplane, so this Dr. Dornier’s fault, not Italeri’s. I attached the mud guard to the main gear strut before locating it in the wheel well. Then I installed the rear bracing struts, leaving the wheels to last. They slipped in very easily after the gear doors were installed. The tail wheel fits in a nice little tub, with the shaft able to turn if you really are impressed with that kind of thing. The tail wheel doors need to be separated, but this is easy, and the doors attach easily to the sides of the tail wheel well. The wing racks are very simple, and consist of two sides plus two mounting arms for the HS-193 or fuel tank. The larger ones go in the left side for the fuel tank, while the smaller ones go on the right, to mount the HS-193. The fuel tank is made up of two sections. The HS-293, on the other hand, is almost a little kit in itself, consisting of 7 parts, It is a little difficult to join the seams on this model, since the fuel tank and fuselage are molded together. There is no Fritz X bomb, although one can be obtained from the Revell HE-177 kit, which contains three, whereas HE-177’s rarely carried more than two. Final assembly includes the attachment of the transparent canopies and turrets. These fit fairly well in most cases, although some filler is required on the nose enclosure. The radio mast can be installed before painting. Leave the fuel drain pipe until after painting, as it will certainly be knocked off several times while the airplane is being handled during the final construction stages. Painting is easy once the airframe is assembled. Topside colors are shown as 72/73 in the instructions, but since I use Model Master paints, and in that series, the colors 72 and 73 are indistinguishable (paint them together and see if you can tell any difference), I used a 70/71/65 scheme, which shows similar color contrast in the black and white photos that have been published of this aircraft. The plane I modeled, DO-217E-5 of 4/KG100, had side mottling, certainly more interesting that the more usual green/green/blue or black found on most DO-217’s. Decals: The decals are VERY matte, but turn out to be excellent, and they require no trimming. A little bit of Micro Sol and Micro Set allows the decals to snuggle down over the irregular raised panel lines. Quite a few maintenance markings are provided, including walk lines and fuel filler cap markings. The side crosses and unit codes seem larger than what is shown in the drawings included in the instructions, and there is a little bit of confusion on the locations of some of the smaller decals, but the overall effect is excellent, sort of like some of the FW-190 and ME-109 kits recently released that have many of the detail maintenance markings. A coat of gloss lacquer is necessary before decal application, and afterwards, some dull lacquer will achieve the correct “sheen” for Luftwaffe aircraft. After market decal swastikas will finish the job. Final Touches: I would suggest painting the small parts, such as control hinges, before installation. I used super glue for these, along with the fuel drain pipe located on the rear fuselage. Thin electronic wire serves as the LF antenna. The props were installed last, before any weathering was done. These aircraft were used under some pretty rough conditions, so it would be appropriate to use heavy weathering, except for the fuel tank and HS-293, both of which were on one way trips. Recommendations: This kit was fun to build. The assembly was straightforward, and there were no surprises. Although not up to leading standards, it is a good basic kit, and no doubt will not be released by another manufacturer for a long time, so if you really want to build a standard or not-so-standard DO-217, this is your bird. Although there is a resin aftermarket kit to “correct” the front cowling openings, I don’t think that this conversion is really necessary, as the model actually looks like the plane, and isn’t this the point of all of this? Now we can dispose of the old Airfix kit, which is now clearly out of date. This kit is worth buying and building. Thanks to Italeri for the review sample and to John Noack for giving me the opportunity to review this kit. |
|
) |
) |
) |
) |
) |
) |
) |
) |
) |
) |
) |
) |
) |
) |
) |
|
|
Information, images, and all other items placed electronically on this site are the intellectual property of IPMS/USA ®. |
|