|
Italeri 1/48 F-86E Sabre |
|
|
Kit Number 2636 |
|
|
Reviewed By Mark Andrews, #33206 |
|
|
|
|
|
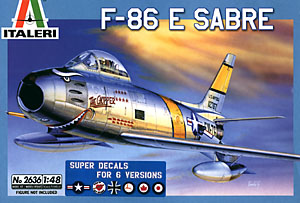
Parts: 79 plus decals MSRP: $22.00 USD Over the years there have been numerous kits of the F-86 Sabre Jet. Most have been good quality and represent most of the variants of the Korean War veteran. Italeri has released a new kit of the ‘E’ version that is quite good. Upon opening the box you’ll see four sprues in light gray plastic. All the parts show little to no flash and have delicate engraved panel lines. Upon study of the parts diagram, there are a few that are not used in this kit. The impressive decals sheet is nearly the same dimensions as the box. Printed by Cartograf, they are crisp and right on register. 6 different versions can be made with the decals provided. Two are USAF versions from Korea, South Africa, Germany, Canada and British. I will be building mine in USAF markings from the 336th FIS, K-14 Air Base, Korea 1952. |
|
) |
) |
|
|
|
|
First out of the block is the cockpit assembly. This is rather basic and lacking in the detail department. Super detailers will want
to add resin and photo etch parts here. The instruments are represented by decals. Closing the cockpit into the fuselage halves
goes very well. This is also the point where you need to add weight to the nose. I put mine behind the cockpit since there really
isn’t enough room in front. The instrument panel coaming and the rear cockpit decking is molded in clear plastic. This does
simplify painting the HUD area. I do recommend painting both sides of the parts for an opaque appearance. Before you assemble the
wings, you need to decide what version you are going to build. The Canadian and British versions carry Sidewinder missiles on the
wings, and attachment holes will have to be opened. Upon piecing together the machine gun muzzle panels and the nose/intake, I
discovered several gaps around the back of the nose piece and the panels. All of this took some filling and sanding to achieve the
perfect fit. At the bottom rear of the fuselage is a triangular part that is inserted here. This, along with another set of drop
tank fins, points to possibly other variants to come out. Maybe an FJ-3 Fury? The part needed some filling here also. The wing to
fuselage joint is fairly good but it did need a small shim. I installed a .015" thick strip styrene shim on the right wing root.
That seemed to solve the problem. I did come across an interesting inconsistency. The stabilators have raised details while the
rest of the kit is engraved. They do depict the all flying version of the tail for the ‘E’ version. But I am unsure why the detail
is raised. This, of course, can be sanded off and new details scribed in. The clear parts fit well and are very crisp in detail.
All the way down to the canopy detonation cords. It is now time for paint. I left the landing gear and doors off to ease painting as well as left the wing assembly removable. That will help with masking for the yellow band around the fuselage. After a coat of gray primer, I airbrushed two coats of Alclad II Aluminum lacquer. Then all of the yellow areas were masked off and painted using Testors Gloss Insignia Yellow. There is one discrepancy with the instructions. On the box art the nose is shown in yellow, but the painting diagrams do not show this. >From further research, the nose is supposed to be yellow on some versions and not on others. All panel lines, weathering, and decals were applied after a Future gloss coat. The yellow bands are all bordered with black decals. The aircraft is covered in stenciling and the decals hit on most of it. The decal sheet does not include the black striping to border the nose if painted yellow. All of the other black outlines are included. From my research, the two US Korean War versions do not have the yellow nose. But I am sure that there is still the possibility that they could have been sometime in their career. The black striping is not sized very well. On the vertical tail, the bottom stripe is way too short and will have to be supplemented with extra decals or paint. The wing stripes are too long and will need some trimming. The wing walk outlines are a bit short also. Otherwise, they do respond well to decal solvents. After paint, decals, and some black wash, all was sealed with a coat of Future. Overall this is a great kit of a very important aircraft from Korea. Fit is good with great detail. My example was missing 2 parts, 3D and 9C, the nose gear strut door and the landing light panel. Both are easy to scratch build if necessary. My only real problem was the discrepancy with the painting instructions. Italeri could have done a bit more research with this. I do recommend the kit for anyone with some experience with natural metal finishes. Additional References: The Aerospace Encyclopedia of Air Warfare Volume 2, 1945 to the Present, Aerospace Publishing Ltd. - London, England 1997, Under License by AIRTime Publishing Inc. - Connecticut War in Korea 1950 - 1953, D. M. Giangreco, Presidio Press Inc. - California 1990 |
|
|
|
|
|
Information, images, and all other items placed electronically on this site are the intellectual property of IPMS/USA ®. |
|
)
)
)