|
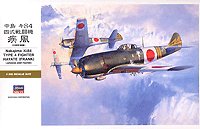
Hasegawa 1/32 Nakajima Ki84 Type 4 Fighter Hayate (Frank) |
|
|
Kit Number ST24 |
|
|
Reviewed By Fred A Amos, #6672 |
|
|
|
|
|
MSRP:
The model is very well engineered so that the parts fell together like a shake and bake kit. One of my minor problems with the kit is the calling out of colors. I make no claim to be an expert but when the instructions call for everything from the firewall forward (except for the prop and spinner) to be silver or steel, then I have to wonder. Until I got to the decals this kit was an absolute pleasure to build. More on this and other minor problems later. Construction of course starts in the cockpit. There are 21 pieces to assemble. All of the levers and handles are there along with side panels and front and back bulkheads. The only thing missing in the cockpit is belts and harness…other than that, it is very convincing when it is completely assembled. The floor of the completed cockpit has pins that plug into holes in the sides of the fuselage making for perfect positioning. When that is done, the fuselage halves go together with no gaps at all. The headrest is assembled in two pieces and then the pad is glued in place. Don’t forget the gun sight, it’s easy to do. You have a choice of open or closed cowl flaps. If you choose to use the open set you can install the linkage that operates them, and the exhaust stacks. If you choose the closed set, the cowling and exhausts can be painted separately and then glued into the cowling before final assembly to the fuselage. The stabilizers each have three alignment tongues and this is where my first of very few problems came up. I glued one stabilizer in place and when I tried to place the second one they wouldn’t line up. After fiddling with it I finally managed to get them line up so they were level with the horizon. The wing has a spar arrangement that glues to the lower section, similar to on the Bf 109 kits. Then the upper halves are glued into place. Again the fit was superb, as is the fit of the wing to the fuselage. The only place on the kit that I had to use filler was at the front of the wing to fuselage joint. It was necessary to pull the wing tips up with tape to close the gap at the root, but no filler was used. A nice feature of the wings is the landing flap detail. The flaps are separate and can be assembled open or closed. If you want them open there are four appendages that represent the hinges and a mating place for them to go when you glue them on. If you want them closed, cut off the hinges and glue the flaps in place. Another nice feature of this kit are the canopy parts. They are superbly clear, and the fit is outstanding. The aft section has something I don’t recall ever seeing before. It has two small pins on the mating edge and holes in the fuselage deck to receive them. The sliding piece fit the upper deck and though it may not be able to slide back and forth, it can be fitted in the open position and still set on the sill like it is supposed to. The fit of the complete canopy is very good. Painting: At this point the model has everything but the landing gear and other small pieces in place and it is ready to paint. As I said earlier the color callout is questionable to me. I chose to paint with Polly Scale Acrylics rather than Gunze Sanyo because most of the Gunze colors are not available to my favorite hobby shops. The bottom color was called out as Gray Green so I chose Polly Scale #505090, US Navy Light Gray. It looks pretty close to the color on the box photo. After it has dried I gave it a misting of Testors Gloss Coat and let it set over night. Next day I masked off the bottom and painted the upper fuselage. The instructions called for Olive Drab FS 34087. Looking at the picture on the side of the box I felt it was a good choice so I used Polly Scale # 505080, Olive Drab. When it dried I realize that the color was a little too dark so I added a little white to the OD and went over the model one more time, very lightly. Another application of Gloss Coat was applied. Placing some Glad Press n’ Seal on the bottom of the wing, I cut out the landing gear wells and the insides of the flaps and painted them, the landing gear doors, and flaps the color closest to what was called for. I used Polly Scale # 505272, I.J.A. Light Green and then it was ready for decaling. Decaling: The decals come on two separate sheets of 8-1/4 by 11-Ľ inches. One sheet has all of the markings of color, Hinomaru and Sentai symbols. The other sheet has all of the white backgrounds for the color markings. The problem is that the white decals don’t fit the model the way they are supposed to and they broke up badly while trying to position them on the model. I finally decided that they were beyond use and painted the very large white areas behind the Hinomarus and left them off under the numbers and other background areas. After these problems were overcome the rest of the decals went on effortlessly. And it appears the yellow areas didn’t need a white background at all. The rest of the final assembly went pretty much like you would expect a Hasegawa kit to. The landing gear is well detailed and fits like a charm. The support for the fuel tanks on the wings is well thought out and after some fiddling looks very convincing. High Points: I guess the high point of this kit is the excellent engineering and fit. The features that stand out are the choice of open or closed cowling flaps and mechanisms and exhausts. I must not forget the canopy and its fit. Aside from the white part of the decals the rest were very high quality and in perfect registry. So there it is. I can highly recommend this kit for the large scale and/or the Axis modeling enthusiasts. Low Points: As I said the worst of this kit is the decals. Another thing is the antenna post on the top of the horizontal rudder. It is very fragile and broke off before I had even finished the kit. I had some scraps from some photo etched part so I cut a piece to represent the post and then super glued invisible thread to it and the main post behind the canopy. And the other thing was the questionable colors called out. I want to thank both Hasegawa and Dragon, and John Noack and the Reviewers Corps for letting me build this beautiful fighter. |
|
) Decals are perfectly registered. |
) Can you tell that the white was painted on. |
) Bottom details are just as complete as the rest of the model. |
) It's a shame you can't see the interior. |
|
Ki84 Frank interior minus left side wall. |
|
|
Information, images, and all other items placed electronically on this site are the intellectual property of IPMS/USA ®. |
|
)