|
Classic Airframes 1/48 IMAN Ro-37 |
|
Kit Number |
|
Reviewed By Orlando Reyes, #6399 |
|
|
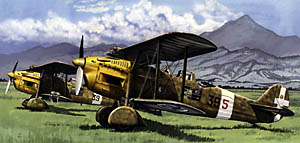
| MSRP: $44.95 USD The kit comes in the standard Classic Airframe box of soft black cardboard with a beautiful rendition of an Iman RO-37 in a grassy field somewhere in Italy. Inside the box you will find four (4) sets of sprue ; three (3) in gray color and one (1) in clear plastic. The three (3) gray sprue are marked with letters. In addition there is a fret of photo-etched parts; one (1) set of decals; a package of resin parts; a film containing the dials for the instrument panels and an instruction booklet. The instruction booklet contains six (6) pages and starts with a short story of the aircraft. This is followed by a set of drawings showing a plan view of the parts. In this page you also will find the paint reference guide. There is one color with a FS number, the rest of the colors have no FS reference. The last four (4) pages are divided into twelve (12) steps describing the construction sequence. The kit contains a total of 53 gray; 5 clear plastic; 10 resin and 40 photo-etched parts. There are decals for three (3) aircraft. They are the 39a Sq., 5th. Gr., 39a St. at Venaria Reale, Italy, circa 1940. There is another set of decals for the same outfit but located at Scutari, Montenegro circa 1942. The third machine was located at Cortiza, circa 1941 and is for the 37a, 72nd. Gr., 19a. St. My sample did not contain any type of color profile for any of the aircraft depicted in the decals. I choose to make the one shown on the box cover. Panel line detail is both raised and recessed. Prior to starting construction, the plastic parts were wash in soapy/lukewarm water and allowed to air dry. The photo-etched parts were washed in vinegar. This allows the paint to adhere better. After the parts were dry the instrument panels, seats, cushions and straps were painted as per directions. The interior of the fuselage was also painted and this time and allowed to dry. All interior detail was added and the fuselage halves were glued. I had a little trouble aligning the fuselage pieces. To build this particular type of machine you have to cut 15 mm in the front of the cabane struts. The directions/plans do not give you this dimension and you have to guess at it looking at the plans. I feel that this dimension/distance should be given in order to facilitate the building of the kit. This information is given until step #3 and it shows with the symbol to cut but is shown in such a manner that the actual location is guess work. I tried to make the front of the aircraft stronger by adding cardboard sheet to the cut area. I found later that this was not a good idea as I certainly made that section stronger but the nose of the airplane becomes weak once installed. I solved the problem by taking the cardboard and adding strips of plastic forming a cone. The other problem I found is that you have this beautiful detail in the wheels but if you use the pants, all the detail is covered. In addition the landing gear assembly does not have a pin to support the wheels or the pants. This part has to be glued with super glue and you run the risk that if you do not align them correctly the model will seat askew. I will recommend this model to the experienced modeler based on the above mentioned areas. I spend approximately 20 hours building the kit most of them figuring out ways to make the construction sequence easier to follow. Regardless of the above I enjoyed building the kit very much and would like to thank Classic Airframes for the opportunity of doing so. |
|
Information, images, and all other items placed electronically on this site are the intellectual property of IPMS/USA ®. |