|
Classic Airframes 1/48 DeHavilland Vampire FB.5 |
|
|
Kit Number 470 |
|
|
Reviewed By Paul Bradley, #35554 |
|
|
|
|
|
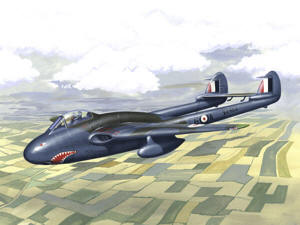
MSRP: $45.00 USD The DeHavilland Vampire is one of the classics of British aviation. First flown in 1943 and entering service as the RAF’s second jet in 1945, the Vampire family ran to over 4,200 airframes and was exported to 28 countries. The last active-duty Vampires were those of the Swiss Air Force, which did not retire the type until 1990. Many of these Swiss airframes are still airworthy and are on the air show circuit today. For such a prolific aircraft, the Vampire has been ill served by model manufacturers. The previous injection molded kits to 1/48th scale were very poor indeed, but Classic Airframes once again comes to the rescue with the first in a family of kits for the Vampire. The kit is molded in Classic’s familiar soft gray plastic, with a bag full of excellently detailed resin parts for the cockpit and undercarriage bays. The undercarriage legs are plastic, while the wheels are also resin. Surface detail is of finely engraved panel lines, but the smaller plastic parts are notable for their lack of finesse, and the molds were slightly mismatched on my example, causing an awkward step to clean up on the undercarriage legs. Construction begins with the all-resin cockpit. This is nicely detailed and some careful painting here will reap rewards should you opt to leave the canopy open. All I added was a set of tape seat belts. The cockpit floor attaches to the lower nose/ nose wheel bay. The cockpit sidewalls are then attached to form a tub. This fit very well when I did a dry run, but when it came time to superglue the fuselage halves together permanently, I had a hang up. Unfortunately, I ended up with some gaps around the lower nose that were of my own doing. Classic advise you to add weight to the nose to prevent tail sitting; unfortunately, they do not tell you how much. Take it from me; whatever you put won’t be enough! Completing the fuselage pod is an armament bay cover, but I did not affix this until much later so that I could add copious amounts of fishing weights into the space behind the tub, but forward of the CoG. With the pod complete, one can see why the Mexicans referred to their Vampires as “avocados!”. Setting aside the pod for now, I turned to the wings. First up, the trailing edges are very thick and need a considerable amount of sanding to get them to something like scale thickness. Having done this, the resin undercarriage bays needed to be sanded down to fit into their recesses properly. The wingtips are separate, enabling the modeler to build an F.3 if desired. The wing tip pieces are too thick and need sanding down to blend them in. The next step was to insert the resin intakes. These have excited some comment online for their incorrect outline, and this is quite noticeable once you examine photos of the real thing. These can be corrected – Brett Green at Hyperscale has a neat article on how to do this. Later boxings of the Mk.5 include corrected intakes, and Jules Bringeuer at Classic Airframes was kind enough to supply these to me for this review. In truth, these are not all that different, but the difference is enough to make a big alteration in the appearance of the finished model. One point here – the cockpit heating inlet to the side of the intake needs to be slightly bigger in diameter, easily taken care of with a rat-tail file. Once the wings are set, one can either add the tail booms or affix the wings to the fuselage. I would advise the latter, as there are problems with the fit of the wings that ought to be taken care of first, so that you can ensure the booms are set at the correct angle. I found that although the starboard wing was a pretty good fit after some fettling, the port wing had a slight anhedral when mated to the fuselage. This called for a shim of 20 thou plastic card to get the correct angle. This in turn affected the fit of the port boom to the wing – see how these things all tend to be interrelated?! Another thing to remember with the Vampire is that the booms have a straight top line from the fairing over the wing to the vertical tail, and are parallel to each other in all three dimensions. Once the booms had set up, I added the one-piece tail plane, ensuring this was also at 90 degrees to everything. The fact that this is a limited run kit makes all this alignment that much more critical and the need for fine tuning the fit can be a little frustrating. Filler was needed on all major joins. A Hasegawa kit this is not! With the major aspects of the model complete, I added the main undercarriage legs, so that I could gauge how much more weight I needed to add to the fuselage pod; this can be attached to the back of the cockpit tub. Once satisfied, I closed up the armament access door. The fit on this wasn’t too clever either, and I added shims on both sides to get a better fit. At this point, I was able to apply the camouflage to the model. The kit contains decal options for three aircraft; an RAF FB.5 of 112 Sqn. in an experimental camouflage of PRU Blue overall with a disruptive pattern of Dk. Green – topped off with a nice shark mouth; an overall Aluminum FB.5 of 421 Sqn. RCAF; and a Dk. Sea Grey/Dk. Green over Aluminum FB.52 of 75 Sqn. RNZAF. Naturally, I chose the RAF machine, not least because of the fearsome shark mouth! It wasn’t until I started applying the paint that I realized that the under-wing RAF serial numbers traverses the undercarriage doors. Normally, I would tack glue the doors in place, apply the decal and cut along the edges of the doors once the decal was dry. But I had already firmly glued the main undercarriage in place, meaning that the doors would not fit over the bays…..I decided to forgo the last two digits of the serial, but let this be a lesson to you…. Once the painting and decaling were complete, it was time for the fiddly bits. The nose wheel leg is molded with one fork separate, which means an awkward little seam. Dry fitting the nose leg revealed two things: 1. The nose leg is too long and 2. I needed still MORE weight to stop tail sitting. The Vampire sits very low to the ground and checking numerous photos, I noticed that the tail booms are normally parallel to the ground. The model would have a pronounced “tail low” stance if uncorrected, so I removed about 1mm from the nose leg and firmly glued it in place. This improved the model’s stance no end. The other problem was solved by adding weights to the under-wing drop tanks. I was not originally going to use them, as they don’t do much for the lines of the aircraft, but needs must….these were butt joined in place after careful sanding to prevent too large a gap between wing and pylon. This small amount of additional weight solved the problem, though only just. The final addition to the model was the injection-molded greenhouse. The windscreen is not the best of fits, but a little sanding and filling gave reasonable results. The canopy was left in the open position, as the shape gives some distortion. Shape-wise, it looks fine – I have read a review panning the canopy, but I cannot see what the problem is. Answers on a postcard please…. I am a big fan of Classic Airframes. They produce injection molded kits of aircraft I want to build and many of which are unlikely to be kitted by your mainstream manufacturers. They are rather rough and ready in places, but their standards improve all the time and I for one always look forward to Mr. Bringeuer’s latest vision. The Vampire kit is not an easy build – the design of the aircraft ensures that. But this is a good effort that can be made into a fine model by someone with a bit more time and patience than I. One other point; I would advise you to check your photo references carefully, as having completed the model I have questions about the length of the nose. It might be that the canopy is set slightly too far back; compare the position of the intakes in comparison with the canopy, remembering that the intakes are not quite right. Someone else’s viewpoint would be helpful here. Aside from this, I have already mentioned the length of the nose leg and the sit of the aircraft, and the intakes. However, otherwise the model looks fine, dimensionally it checks out just fine and overall this is a very nice representation of the Vampire. I can recommend this kit to those with experience with limited run kits. This kit is also available in two further boxings, both featuring some of the many export Vampires. Also in the Vampire family, there will be T.11/22 and T.55 trainers, plus the NF.10 night fighter version. Hopefully, an FB.9 and F.1 will also be released in the future. My sincere thanks to Jules Bringeuer of Classic Airframes for the review kit and the replacement intakes. This kit is available from all good hobby shops. |
|
) |
) |
) |
) |
) |
|
|
|
|
|
Information, images, and all other items placed electronically on this site are the intellectual property of IPMS/USA ®. |
|
)
)