|
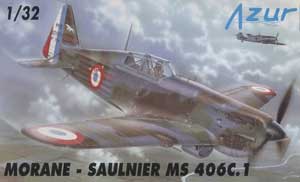
AZUR 1/32 Morane-Saulnier MS 406 C.1 |
|
|
Kit Number 3201 |
|
|
Reviewed By Fred A. Amos, #6672 |
|
|
|
|
|
MSRP: $55.00 USD Having developed a fascination with early World War Two French aviation, about a year ago I built the Azur 1/32 Dewoitine D 520 and a 1/48 Azur Arsenal. I had a fair amount of trouble with them, but I was able to get some presentable finished models. So I guess I didnĺt expect too much from this kit when it was offered for review. I believe I was right. The Azur 1/32 scale MS 406 C.1is a multi-media kit, with plastic, metal, resin and film details. There are four sprues of gray plastic, one clear for the canopies and navigation lights, 14 pieces of resin, and a metal fret for the instrument panels, seat belts, and various levers and trim wheels. The first problem came on opening the plastic bag to get to the kit. The three canopy sections fell out, having broken off from the clear sprue in transit. The main sliding part was badly scuffed on the right side and the windshield had the lower right corner broken off. I immediately contacted John Noack about the problem and he emailed the manufacturer and requested a replacement. While waiting for an answer I went ahead and started on the kit. Of course the first thing I do to any kit is dry fit the main components looking for any problems. The first problem was that the upper wing had extended ejector pin posts just above the wheel wells preventing the wings from closing at the leading edge. Not thinking to take a picture of it I went ahead and cut them off. Then the wing fit reasonably well. The exhaust stacks are resin and have to be super glued into place before the fuselage halves are closed. The holes where the stacks go are too small so I whittled them open with a new number 11 X-Acto blade and secured them in place. I donĺt know how anyone could paint them before hand so I didnĺt. I taped the wing parts together followed by the fuselage halves and dry fitted the wing to the fuselage. Fit problems again were found. The problem was the front of the lower part of the bottom of the wing, it needs to be filed and sanded back about 1/16th of an inch. Then where the front of the upper wing fillet meets the lower wing needs to be sand to fit better, also the same with the trailing edge fillet. (See arrows in the photos) A note here about the paint colors: the instructions call out Gunze numbers, but do not give any color names. Fortunately, I have a Gunze Color list with which I was able to translate the numbers into colors. Checking all the numbers I found that I didnĺt have those particular Gunze paints so I bought the four main colors in the Polly Scale line and used them. With the dry fitting problems fixed, or so I assumed, I could now proceed to the cockpit. First all of the resin and plastic cockpit parts were painted a very black blue color instead of the color called out, H77 Flat Tire Black. This was a mix of Model Master dark sea blue and light gull gray. Per instructions (and who am I to question instructions), I painted the back of the instrument film Gunze H34 Gloss Yellow CrŔme. Concerned that painting the metal instrument panel parts the same color as the interior would have hidden them; I chose to leave them in their natural color. I carefully cut the film parts apart and placed a little super glue on its front side and placed the film on the back of the metal then placed a little super glue on the back of the film and laid them to the appropriate place. I moved on to the framing and its levers and panels. Then I carefully super glued the metal seat belts to the seat. I had painted the seat cushion a dark earth color and did so to the seat belts as well. With all of that done I proceeded to assemble the cockpit parts to the finished instrument panel. There is no way to dry fit the cockpit before it is placed into the fuselage halves. It was at this point that I realized that the instruction sheet is not completely clear. One of the control levers on the left side of the frame winds up behind the edge of the instrument panel. So be careful where you place the forward set of levers on the left side. Now it is time to assemble the fuselage halves together but there is a slight problem. The fuselage halves no longer fit like they did when I was dry fitting them. When the rudder and top of the fuselage are lined up and taped together there is a long tapered gap on the bottom, about 1/16thinch wide from under the cockpit to the tail wheel. I had dry fitted these parts before I started on the cockpit so the only thing I can assume is that I some how did not do the cockpit interior correctly. So after running some Tenax 7R, in the seams that did fit on the top and temporarily taping over it I let it set for a few hours. Then brushing in more Tenax 7R in the bottom seams and using a clamp I was able to pull everything together. I let this set for a few more hours. I had already glued the three wing parts together so I took this opportunity to sand down the seams in the leading edge and clean up the trailing edge as well. These parts did fit really well. So now the fuselage is glued together and I commence to dry fit the wing to the fuselage. Disaster strikes again. The front part of the fuselage fits the wing but the back part is the about 1/16th inch too wide on each side. I must have really done something wrong in the cockpit area. ! After a good deal of sanding the edge of the wing where it meets the wing fillet I got a pretty reasonable fit. But then I realized that with the upper edge of the wings smooth I had a serious step under the fuselage at the point the rear of the wing meets the fuselage. Hmmm. Did I cut away too much material while dry fitting? If I had the wing to fuselage would have had a serious step. I laid some thin sheet styrene in the step areas and put Tamiya putty thinned down with denatured alcohol in the area to fill it in. After some vigorous sanding I got it looking fairly presentable. I then glued the rudder and stabilizer parts together and set them aside to dry. After cleaning up the edges these were then glued into place and the seams appropriately filled in. At this point I found a serious oversight on my part. I had failed to place in the lower wing the parts that would hold the retractable radiator. Too late to fix it so I assembled the radiator and placed it in the retracted position, as if it had been parked for some time. The only thing left short of the canopy parts before painting was the armored headrest and roll over structure. These went in without to much grief. Still waiting for the new clear parts from Europe I decided to go ahead with the one good canopy piece, the rear part. When I had dry fit it before, it just barely fit but now for some reason it wonĺt rest on the cockpit sills. I took some very thin sheet styrene and cut a piece about 3/32 inch wide and glued a piece to each sill and painted everything to match the rest of the cockpit. Then the rear clear piece fit so that the sliding piece would fit over it and still sits on the sills. At this point I had gone as far as I could without the new clear parts. So I sat back and waited, and waited. Finally after almost a month the clear parts arrived in good condition. I taped the sliding part in place and fitted the windshield. Something is amiss! With the front of the windshield on the fuselage and the vertical part meeting the front of the sliding part, the bottom curved part of the windshield wouldnĺt touch the fuselage. At this point I was so disgusted that I completely forgot to take pictures. I went ahead and glued the sliding part of the canopy in place and after it had set up I glued the front edge of the windshield to the fuselage and the vertical part to the sliding part. Then I carefully placed a little Micro Kristal Klear in the open gap, and wiped it smooth. I had already washed the model to get rid of all the dust and body oils so after masking the clear parts with friskit paper it was ready to paint. I used the Polly-Scale colors for the period of early World War Two as called out in the instructions. After the Light Blue Grey (Polly-Scale505242) was on the bottom of the model I applied a liberal coat of Testors Glosscote Lacquer and let it dry overnight. Then I masked off the bottom of the model completely with Tamiya tape and Glad Press n Seal. Next I painted the Dark Blue Grey (505236), then French Khaki (505238) and finally the French Earth Brown (505240), the last two freehand. I will say I was a little disappointed with the colors, they are so muted that it is hard to see them. But then thatĺs what camouflage is all about. Isnĺt it? After this was dry for a few hours and the mask removed, I started with the decals. Now here was a pleasant surprise, everything was in perfect registry and the whites were heavy enough that you canĺt see any color shift under them. The decals were compatible with the Micro Scale system. Everything snuggled down without any problems. I gave the entire model another light coat of Testors gloss and then a 50/50 mix of Glosscote and Dullcote for a satin finish. After this was dry I removed the masks from the clear parts and finished the assembly of the small parts, landing gear, antenna, pitot tube, navigation lights and gun barrels. I tried to use the photo-etched gun sight on the top of the fuselage but it was just too fragile. So there you have it. Despite all of the fit problems it turned out looking pretty decent. I will admit that some of the fit problems could have been my own fault but not all of them. OK I have pointed out the low points of this kit, what are the high points? Number one has to be the response of the manufacturer concerning the broken clear parts. They did respond even if it was a slow response. The fit of the parts was good until the cockpit was in place. The recessed panel lines are faint but visible and the raised detail is not over stated. The decals fit well but I wonder about the correct shade of Red. All in all if you are a skilled and/or resourceful modeler then this kit is for you. But I wouldnĺt recommend it for beginners. Despite all the grief I would give this kit high a mark. It is an unusual subject in a great scale and should look great next the Dewoitine D 520 and a Me 109 Emil of the same era. The kit was provided to IPMS/USA by the folks at MPM. |
|
) As you can see the Polly-Scale colors are pretty well muted. |
) This is probably why the fuselage wouldn't close properly. It looked good to me at the time. |
|
This clearly shows the broken corner of the windshield. |
) You can see how much filling was needed in the wing root area. |
|
Information, images, and all other items placed electronically on this site are the intellectual property of IPMS/USA «. |
|
)