|
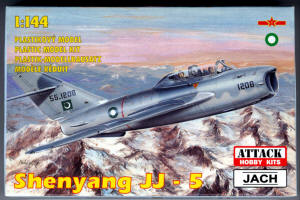
Attack Hobby Kits 1/144 Shenyang JJ-5 |
|
Kit Number |
|
Reviewed By Jim Pearsall, #2209 |
|
|
|
www.attack-hobby-kits.cz MSRP: $9.96 USD The Company Attack Hobby has been around for a little while, but I’d never heard of them. Their previous kits have been 1/72 WW2 armor projects for the real armor enthusiasts. They have recently released 3 1/144 50s/60s jets, a MiG-17, MiG-17PF and Shenyang JJ5. Hannants promises a MiG-15 and MiG-15UTI from this company in 1/144. The Aircraft When the USSR needed a jet trainer to get pilots ready for the hot MiG-15, the design bureau came up with an aircraft which was easily converted from the existing aircraft. A second cockpit was added behind the standard position. The PLAAF (People’s Liberation Army Air Force) needed an aircraft for the same purpose, but they weren’t building MiG-15s in China. They had converted some Soviet built MiG-15s to MiG-15UTIs under the designation JJ2. They used the same technique, and almost identical canopy designs, with the MiG-17 instead of the MiG-15. The result is the Shenyang JJ5. There is some confusion about the manufacturer’s names here, as Shenyang apparently built only the J5 fighter, and Chengdu (AKA CAC) built the JJ5 trainer. So should it be Chengdu JJ5, CAC JJ5, or is Shenyang JJ5 correct? The JJ5 is being replaced in PLAAF training squadrons with the JJ8, so its operational life is close to over. Since Pakistan is now receiving F-16s, it’s possible the JJ5 will be replaced by F-16Bs. Or not. |
|
|
| I built a KP MiG-15 UTI,
the one Yuri Gagarin was flying when he was fatally injured. My first impression of both of these aircraft (Mig-15
UTI and JJ5) is that the canopy is about as attractive as a mud fence. But handsome is as handsome does (Forrest
Gump) and this arrangement appears to work. The aircraft has limited air-to-air and air-to-ground capability. With a single 23-mm gun and no radar, this is really limited. Apparently the wing tanks could be replaced with bombs. The Chinese appear to have learned much about OPSEC (Operational Security) from the former Soviets, and information is not easy to get. Via the internet, I could confirm only that Pakistan and the PLAAF use the JJ5. There may be others. The Kit 4 sprues, 3 grey, 1 clear, plus decals for PLAAF “red 63549” and Pakistan AF “black 1208”. 24 parts, plus the cockpit. There’s an unused nose section for the MiG-17PF, plus the guns. The color schemes available are natural metal for the PLAAF and a 3-tone grey scheme for the PAF. Since it’s 1/144, everything is “petite”. Get good glasses or a magnifier. Outline of the wing and fuselage match larger scale drawings, although there just aren’t any 1/144 MiG-17 drawings to work from. |
|
|
| The Good Stuff Everything is injection molded. Flash free; very, very fine recessed panel lines. No resin, no vac, no photo etch. The wings attach to the sprues at the wing root. This means you have to be careful when you clean up the joint not to leave a gap between the fuselage and the wing. But you don’t have to clean up a cut off spot anywhere on the leading edge, trailing edge or wingtip. I wish more mold designers thought of this sort of thing. |
|
|
| And almost everything fits perfectly. In spite of no locating tabs for the wings or horizontal stabs, I was able to get a good fit, and everything squared up well. I found that the vertical stabilizer wasn’t vertical. I had to gently bend it to get it straight. This actually closed the seam where the right fuselage half (which doesn’t have any vertical component) had a gap at the bottom of the tail. |
|
|
| The Other Stuff There’s no cockpit detail whatsoever. You paint the top of the fuselage black to simulate the cockpits. The exhaust pipe doesn’t fit inside the fuselage. I cut it down in diameter, but still couldn’t get the bottom of the fuselage halves to meet nicely. This is the only place where I had to use putty. I did have to use a bit of Mr Surfacer #500 along the wing/fuselage and horizontal/tail joints. When I put the canopy on, I used Elmer’s Glue, and applied a second coat to act as filler. Worked nicely for me. The bottom of the canopy matched the fuselage contour exactly. The landing gear went together better than I had thought they would. The gear doors came apart nicely, and I did it without losing a single part(!). The instructions suggest putting some weight in the nose to keep all 3 wheels on the ground. Before I tried to insert the exhaust pipe, and before the wings were on, I filled the fuselage front with birdshot and Elmer’s to about even with the wing leading edge. After I got the wings and gear assembled, I set it down to see if there was enough weight. Not enough. I drilled out the center of the jet exhaust and added more weight. The shot now is back to almost even with the main gear. But if you push the tail down, the nose returns to earth as soon as you release it. Finishing I had to clean my airbrush very carefully, and then file a burr off the tip of the needle to get a really fine spray. With a wingspan of less than 3 inches, this was a challenge to keep the overspray in check. Nevertheless, it looked really nice when painted. The canopy is not optically perfect, but since there’s no interior, this is not a bad thing. The canopy did nicely after being dipped in Future, and the lines, although fine, were a correct painting guide. The decals were thin, and stuck right where I put them. I had to put some Future under each of them to allow me to slide them and get them positioned. |
|
|
| Overall A really nice kit. The lack of a cockpit isn’t a show stopper in 1/144. Most 1/144 single seaters don’t have them. Good outline, good fit, and some thought was given about the way the parts come off the sprues. I believe I can say without fear of contradiction that this is the best JJ5 kit available anywhere. Of course it’s the only one available. But it is a good one. |
|
Information, images, and all other items placed electronically on this site are the intellectual property of IPMS/USA ®. |
)
)
)
)
)