|
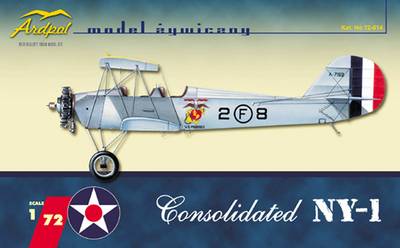
Ardpol Kit Number 72-014 1/72 Consolidated NY-1 |
|
|
Reviewed By Rick Green, #43343 |
|
|
|
|
|
MSRP: $38.00 USD
Those who are likely to read through this article are also likely to be attracted to inter-war aircraft subjects produced in splendid detail in recent years in Eastern European countries. Moreover, such readers probably have read one or more kit build reviews of Ardpol aircraft subjects in publications such as Scale Aviation Modeller International. Therefore, I will skip remarks about the sturdy cardboard box and creamy resin parts and suffice it to say that the fabric, etc. details in this resin are first rate. I will also state immediately that this was my first resin production, and it was somewhat over my head. The project required considerable scratch building, which was not helped by the kit’s vague and inadequate diagrams. |
|
|
|
|
| The parts of this kit, all resin, were separated among various small plastic bags. Nice looking Techmod decals were supplied. Everything was intact, but not for long, as early in the project I cracked one of the seats (this plane is a trainer) in half between my fingers. No instrument panels were included as advertised. While the directions noted that no interplane struts were supplied, it so happened that both interplane and cabane struts, in resin, were included. I ended up using them as templates for first brass, and then plastic struts. I replaced the seat and added instrument panels from a generic Hawkeye Designs aftermarket set that I was hoarding, which I will truly miss once it is completely depleted. The photograph at the end of this piece depicts the resulting difference in the seat sizes, but once the upper wing went on, you could hardly see the front seat anyway. | |
|
|
|
|
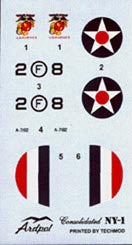
The decals consisted of squadron numbers for the fuselage;
tiny code numbers that appear on the tail; the USMC coat of arms; red,
white and blue vertical rudder stripes; and two interwar stars with red
circles. The instruction sheet consists of a single piece of paper with hand-drawn, exploded-view assembly suggestions, and some front/side/top/bottom views that are rather nicely drawn. You “get the idea” from the instruction sheet, but since parts are not on sprues or numbered, some real guessing is required to achieve correspondence between the part in the box and the part shown in the drawing. I could not understand the cable controls that were depicted on the underside of the fuselage, and ended up ignoring them. For color references, you have to resort to the box art. Clearly, this is a kit that calls out for additional references. |
|
) |
|
|
Locator pins, except for some nubs on the butt end of the
wings and corresponding holes in the fuselage, are not present. There were
indications for strut holes in the wings and fuselage, which later proved
to be helpful. Construction began with the interior. I inserted little ladder-like devices into the right fuselage half, and then superglued the seats on top of them. Separately, using Tamiya Metallic Black in a spray can, I sprayed the engine and the instrument panels. I applied flat white paint to the instrument panel dials with a toothpick, and set them aside. I airbrushed Tamiya Flat Aluminum onto the fuselage half bearing the seats, as well as the other half. With a brush, I ran very thin black paint along the interior lines of the seats. I added masking tape seatbelts painted off-white to the seats along with “buckles”, painted silver and taken from an Airwaves brass bezel sprue. I superglued the instrument panels in front of the seats, simply eyeballing their placement. I painted the map case located on the front pilot’s right sidewall with Humbrol Matt Leather (#62). The upper wing comes in three pieces; I am told that the reason for this is that a single resin piece of this size would be prone to warping. I superglued the three pieces, holding them in place at a guesstimated dihedral until they set up. I used a little Milliput to conceal the resulting seams. I airbrushed the top of the upper wing with a chrome yellow, the manufacturer of which I have now forgotten. I really liked the color. Later, I airbrushed the bottom of the upper wing with Alclad II Matte Aluminum. At this juncture, the project turned into my personal version of the “Odyssey”. The fuselage halves had fit perfectly as a dry fit, without any of the interior components. The halves did not come together so perfectly once the components had been added to the interior, although there were no apparent obstructions. I superglued the halves together. Later, I came to believe that my superglue was old, as the fuselage halves began to separate at various times during the course of construction. Over time, I used Milliput, auto body putty, and superglue again to conceal the fuselage seam, once I replenished my supply of Balsa USA superglue. There are metal parts of the forward fuselage, which are supposed to be gray in color in contrast to the silver dope of the fabric on the remainder of the airplane. I painted these parts Model Master Light Ghost Gray. The “metal parts” were masked, and the remainder of the fuselage airbrushed with Alclad II Semi-Matte Aluminum. In joining the lower wings to the fuselage, I tried to insert a brass rod into one wing in order to provide additional support for the fuselage-wing join. This was a dicey proposition, as the lower wing is very thin. I ended up simply using a butt join on the other wing. Butt joins were also the order of the day for the tailplanes, and they ended up staying on securely. Before even thinking about installing the upper wing, I reproduced the cockpit coaming that is shown on the box art but not built into the kit, probably because of casting limitations. I rolled out some Milliput in a thin strand, and created the padding from that material. I hand-painted the coaming with Tamiya Hull Red. I also fashioned windscreens out of a piece of bubble pack, dipped them in Future, and superglued them to the top of the fuselage. As noted above, the kit included very delicate cabane and interplane struts cast in resin, which in my view would not even support the quarter-ounce of the upper wing. With the assistance of Review Corps coordinator John Noack, I tried my hand at Strutz brass resin material, which is airfoil shaped. We made credible struts, the interplane in two pieces and the cabane in one, using a Dremel motor tool to notch the pieces and then bending them by hand. (The actual instructions for making struts out of Strutz are fiendishly complicated, driving us to dumb down the whole process.) As it turned out, the Strutz struts looked nice, but lacked the flexibility I required to eventually wiggle the top wing onto the top of the struts. Strutz was replaced by Contrail plastic strut material, which could be easily carved and manipulated to achieve the desired alignment. After manufacturing two interplane and two cabane struts out of Contrail material and spraying them with a can of Krylon gray primer, I drilled holes, using a pin vise, wherever I suspected rigging wire and cables would enter the top wing, bottom wing, fuselage, elevators, and rudder. Using epoxy, I then secured the N-shaped interplane struts to the bottom wing. While the five-minute epoxy was setting up on the struts, I marked with a piece of cardstock the distance between the existing four holes in the bottom of the upper wing, designed to receive the struts. I then placed the cardstock between the two struts that were setting up on the bottom wing, to make sure that the distances were the same. I let this set up overnight. On the next day I placed the upper wing on the tops of the interplane struts, having first dipped the tops of the struts into epoxy. I put two tins of paint on the upper wing and let it sit another day. Before proceeding with the rigging and cables, I decided to put on the decals. I started with the red, white and blue vertical rudder stripes. These went on very nicely with decal solution, but did not come together at the top and bottom of the rudder. Later, the decal material flaked off a bit. Using a small paintbrush, I touched up the edges of the rudder with red, white, and blue paints. I put the code numbers on the rudder without incident, and the squadron numbers on the sides of the fuselage. Later, I unknowingly lifted off one of the “2s” on the left side of the fuselage. This was replaced with a “2” of a similar style from the Monogram Boeing F4B-4 kit, which was a bit oversized. Next up was the rigging and control cable installation. I am not a “thread guy” and use for these purposes a ceramic fiber that I obtain from Precision Enterprises, Ltd. This very fine fiber requires you to hold it down on the cutting mat with two fingers and “cracking” it with a hobby knife. Using this method, and armed with superglue, fine tweezers, and a pair of dividers to measure the distances between points, I managed to install all wires and cables without sags and bends. The wheels had previously been painted Polly S Grimy Black for the rubber and Tamiya Flat aluminum for the hubs. I always shoot the hubs first, then mask them with masking tape, running a hobby knife around the rims. I then spray the black color. In this scale, I am not concerned with weathering the wheels. The beautiful landing gear struts, including a trapezoid-shaped part that provided an interface for the wheels, were just too spidery to support the weight of the airplane. Giving Strutz a second try, I made two V-shaped landing gear struts out of the material, and recreated the trapezoid-shaped parts out of Evergreen styrene sheet. I attached these pieces together with epoxy, and sprayed them with the Krylon gray primer. I also cut short pieces of Strutz for wheel axles, and ran those into the wheels. The wheels were subsequently attached to the homemade landing gear with epoxy. The entire landing gear sub-assemblies were then inserted into pre-drilled holes on the bottom of the fuselage. Again, I perceived the limitations of Strutz, as I tried to wiggle the struts into alignment with each other with limited success. The kit and box art suggest that there are additional supports for the landing gear struts, which I guessed at and fashioned out of Contrail plastic strut material. (There is a paucity of photographs and illustrations of the NY-1 on the Internet, and none taken /drawn from the perspective of the bottom of the aircraft.) Following publication of this review, I intend to rebuild the landing gear entirely out of plastic. The remaining pieces to be glued on included the engine and propeller, the tail skid, and a pitot tube and stack on the top of the wing, which I improvised to hide some holes that I had poked through in the process of construction. The propeller had been colored with silver Rub ‘N’ Buff. The engine, as noted above, had been sprayed Tamiya Metallic Black. I ran a silver pencil over the cylinder cooling fins. The oil cooler was hand-painted Gunze Engine Grey. The intake pipes, which were cast three to a casting block, were painted Tamiya Metallic Brown on the blocks and then transferred one by one to the cylinders, using superglue as an adhesive. The entire engine was attached with epoxy to the nose. The tail skid was painted Tamiya Neutral Gray, and then butt-joined to the bottom of the fuselage, utilizing superglue. After sticking bits of masking tape to the windscreens, and covering up with paper the yellow top wing whose color and sheen I liked so much, I misted on several coats of Aeromaster Semi-Gloss Clear. This served to make the entire surface uniform, downplayed some smudges, and produced a pleasing effect. I build model airplanes for the overall aesthetics of the finished product, and am not keen on trying to conform the look of a kit to historic photographs, or to determine faithfulness to known dimensions, etc. This one looks pretty good to me, and you can judge for yourself by viewing the photographs below. (Photographs by Doc Scarponi.) My thanks to John Noack and to Ardpol for providing the opportunity to review and build this kit. |
|
|
|
) |
|
|
) |
|
|
) |
|
Information, images, and all other items placed electronically on this site are the intellectual property of IPMS/USA ®. |
|
)
)
)
)