|
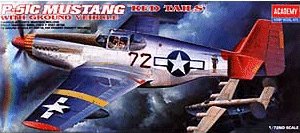
Academy Kit Number 2225 1/72 North American P-51C and Ground Vehicle |
|
|
Reviewed By John R. Lee, #11172 |
|
|
|
|
|
MSRP $10.00 This kit comes in a top-opening box: just right for holding the parts as you work on the kit. It is molded in medium gray plastic (57 parts) and nine crystal clear parts that are packed separately. The canopy has three options: standard closed framed, open framed or a Malcom hood (which was not used on either of the decal options in the kit). Included is the option of four different under wing stores consisting of a nice pair of triple bazookas, 75 and 108 gallon tanks and two rather crude looking 500-lb bombs. The kit has fully engraved panel lines, highly detailed cockpit interior and landing gear, and offers two Tuskegee Airmen decal schemes. With the price at a low $10.00 you can go out and get several if you like the P-51B/C! The ground vehicle (37 parts) is an added bonus. |
|
) |
) |
| As usual the construction starts with the nice cockpit comprising a floor piece that’s engraved to look like wood and includes the radios and the top of the radiator hot air exhaust area. The instrument panel has raised dials but I chose to use an instrument panel decal from an old ProModeler 1/72nd decal sheet I have, which looks better than my shaky painting. I sprayed all the areas that were Interior Green, masking the area around the main wheel wells to keep the I. G. off the underside of the wing. I painted the radios and side detail on the left and right fuselage parts black. The floor is painted a wood color with a dry brush of brown to bring out the grain effect. I then gave the parts a thin brown wash to bring out the details more on all these areas. I also cut off the solid plastic gun sight reflector glass and replaced it with a piece of clear sheet. | |
) |
) |
| I assembled the seat and added a set of Airwaves seat belts painted tan with silver buckles, which I set aside to add at the end. The instructions say to paint the head rest flat black, but all my references show tan or light brown which is what I painted it. Next I glued the instrument panel and stick to the floor and glued the whole assembly to the right fuselage side. I then added the left fuselage side, which was a very good fit. The empennage is made up of separate parts, and on this kit does not have the fin fillet as seen on later P-51’s. On the two forward fuselage parts there is a small hint of a fillet that needs to be removed for the aircraft that I was building. Looks like more releases are on the way – yes! Another good point is that the tail fin has the offset of a degree or two to counter the torque of the engine, something you don’t see on many kits. The tail fits perfectly and with careful application of glue no sanding or filling is required. I skipped putting the exhaust pipes in to ease painting at a later stage of the build. I also plan to use a pair of Moskit pipes. | |
) |
) |
| On to step 3, the wings and tail. As I planed to use only the 108-gallon paper tanks I didn’t in this case need to drill any holes in the underside of the wing so I added those good looking triple bazookas to the parts box. I glued the three wing parts together and again the parts matched up with no filler required. I left off the stabilizer parts to ease the painting of the red tail. I skipped ahead to step 5 and glued on parts A4 (chin scoop) and A5 (radiator scoop). In dry fitting the two parts I saw that these parts are the only really poor fitting parts and without the wing in place I could see that fairing in these parts would be easier. After the small amount of putty was added and sanded I added the assembled wings to the fuselage. The top of the wings fit very well with no filler required on the topside but on the front joint by the cowling there was quite a step requiring a fair amount of filler. It was at this point that I drilled out the mg’s as I planned to replace them with tubing. It was just I had painted and started to decal the plane that I remembered that the guns are not on the centerline of the wing. More later! | |
) |
) |
|
Step 4 is the assembly of the main gear. The tires
were painted Gunze Sango Tire Black and I use my circle template to mask
off the tires to paint the wheels non-buffing aluminum. I also gave
the wheels a thin brown wash and set them aside to install later. Step 5, I added the main wheel doors in a closed position as I want to make a small diorama where the pilot has just landed and is getting out of the cockpit and the doors haven’t dropped yet. This will be to utilize the jeep with the crew chief picking up the pilot who is using “his” plane. |
|
) |
) |
| Step 6, the propeller. Looks good and again the fit was great. I painted the spinner red, along with the tail area and wing tips that I had masked off to keep the red from the NM areas. The prop was shot with gloss black in preparation for the eight decals. I then applied a couple of coats of Model Master flat and when dry assembled the spinner to the blades leaving out part A6 as I like to be able to remove the prop when I go to a model show. | |
) |
) |
| Step 7, the canopy and antenna post. Even though the canopy parts are very clear I dipped them in Future as that protects them when I use super glue to install them. The Future stops the CA fumes from fogging the glass area. Before gluing the windscreen and rear glass to the fuselage I masked off each part with Tamiya tape. I used the closed-framed part as a mask as I was going to use the open framed parts to show off the interior. This required me to mask both the outside and inside of the open parts. | |
) |
) |
|
After removing the masking tape from the NM areas near the
red areas, I masked all the red areas and sprayed the remainder of the
airframe Model Master non-buffing aluminum. I over coated this with MM
sealer in preparation for the decals. There are two decal options are for Tuskegee airmen. 1 USAAF P-51C of Capt. Ed Toppins, 99th FS/332nd FG/15th AF 2 USAAF P-51C of Lt. Lee ‘Buddy’ Archer, 302nd FS/332nd FG/15th AF Number two is the one I chose to make as it has a little more “pizzazz” to it. The decals looked great, but very glossy. As I was modeling a well-used aircraft, the yellow wing bands were a little too bright to me and even though I had applied the natural metal finish I decided to mask and air brush on the yellow wing bands. It worked and they are toned down a lot. While I was at it I painted all the yellow trim tabs too. There are some decals that I couldn’t find a location for. The white ones that are all the same and I have no idea where they go! After the decals were dry I again put down a coat of MM sealer. Note that after checking my references, #16 the fuselage and wing national marking are numbered wrong i.e.: #1, the 35” diameter is for the wing and #2, the 30” diameter is for the fuselage. I then did a light ‘Sludge’ treatment to the panel lines and shot a couple of coats of MM flat to give it that oxidized aluminum look. Next I applied some pastels for the exhaust stains and fluid leakage as seen in my reference pictures of this very aircraft. I drilled a .040Ř hole about 1/8th inch behind the antenna mast (two types of which are included in the kit, another good point) and put in a short piece of Evergreen rod with a #80 hole through it for the antenna wire. Osprey Publications #7 page 43 has a three view of this aircraft, albeit not as dirty as I am building it. Into a #80Ř hole I drilled in the tail I super glued a piece of .003Ř fishing line. When dry, I ran it through the hole in the evergreen rod and pulled it taut by running it through the cockpit. I hung a clothespin on it for weight while gluing it with a tiny dab of super glue. In the Osprey book three view drawing I saw that there was a whip antenna behind the tail wheel. I drilled a #80 hole behind the tail wheel and glued in a piece of whisker courtesy of my unhappy cat. He’ll get over it! |
|
) |
) |
|
Time to add the tires. I have found to me, anyway a neat way of weighting tires. I have a small coffee warming plate in my hobby room. (Need that coffee for those late-night modeling sessions!). I found that by placing a small piece of aluminum foil on the heated surface and pressing the tire onto the foil for a while you get a nice flat with a bulge. The foil protects the plastic and it just peels off. This kit has a very nice set of tires with very good wheel detail so doing the above you have no need to go ‘after market’. This operation can be done after the tires and wheels are painted. I now removed the canopy and red area masking and added all of the remaining parts. Gave the red areas a coat of MM flat and that is that. As an added note I was going to fix the machine guns which are on the center line of the wing but instead, and for the added color, I painted small pieces of Tamiya tape red and placed them over where the mg’s protrude from the wings to represent dust covers – problem solved! |
|
) |
) |
| The Jeep is a nice little kit all by itself. It goes together with six steps. I painted everything olive drab. A couple of Model Master clear gloss coats and on went the seven decals. After a coat of MM clear gloss I laid down a couple of MM clear flat coats. The tires were sprayed Gunze Tire Black and the steering wheel and shift knob MM flat black. Again using my circle template I shot the wheels MM olive drab. I next went to town applying a lot of pastels in various shades of brown and tan to give it a used look. I used a little black pastel on the wheels and near the exhaust area. I drilled a #80 hole in the end of the .50 cal. mg and painted it MM gun metal and highlighted it by lightly rubbing it with a polishing cloth with S & J powder in it. I cut out a piece of clear sheet and glued it to the windshield frame. As I don’t normally do vehicles I am not sure of the accuracy, but it looks like what I drove when I was in the Army. | |
) |
) |
| All in all, a nice, well-fitting kit with only very minor problems. I used filler only on the underside front of the wing to fuselage join and chin scoop. As with most kits there is scope to add a bit of “Super Detailing” if you want. Recommended to all modelers. This kit is available through most fine hobby shops and various mail order companies. I already have a second kit and await the arrival of the P-51 with the fin fillet. | |
) |
')) |
|
References used #1 Camouflage & Markings NA P-51 & F-6 Mustang USAAF, ETO & MTO 1942 - 1945 #2 Osprey #7 Mustang Aces of the 9th & 15th Air Forces & the RAF #3 Squadron #6505 Fighting Colors P-51 Mustang in color I entered this into the Seattle Spring 2004 show at Renton, Washington and managed to take a third place in the single-engine category. At our club meeting (O.H.M.S.) the following Tuesday, I took first in our little club contest. I think most of that was because it makes up into a good-looking P-51 with just a little help from me. Many thanks to IPMS/USA, John Noack and Model Rectifier Corporation (80 Newfield Avenue, Edison, New Jersey 08837-3817 USA) for the kit, a great addition to my model shelf. |
|
|
Information, images, and all other items placed electronically on this site are the intellectual property of IPMS/USA ®. |
|