|
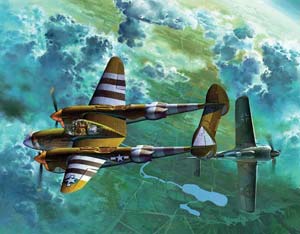
Academy 1/72 Lockheed P-38J "European Theater" |
|
|
Kit Number 12405 |
|
|
Reviewed By Brian R. Baker, #43146 |
|
|
|
|
|
MSRP: $22.00 USD BACKGROUND AND HISTORY Any serious modeler who builds World War II aircraft has to be familiar with the development and service career of the Lockheed P-38 “Lightning” fighter. I can’t add anything to what has already been published except to say that it was a truly unique aircraft that earned its position as a premier twin-engined fighter by its performance, reliability, and adaptability. The fact that some of American’s highest scoring aces used the type certainly doesn’t detract from its reputation. The P-38J was the last major production model, and had the best performance of any of them. It was used up until the last days of the war, although it was in the process of being replaced in the European Theater by the North American P-51D Mustang. The two Squadron-Signal “In-Action” publications on the P-38 are very useful for reference, along with the “Walk-Around” issue. The kit contains decals for two aircraft:
In addition, there are plenty of after-market decals available for the P-38, so there should be no problem selecting a particular color scheme. THE KIT This kit was originally issued with Pacific Theater markings, and this is apparently a second issue only with different decals. The kit has been reviewed on other websites. We thank Academy for providing this review sample. The kit consists of 5 light grey sprues and one clear sprue containing two complete canopies and several small light covers. Instructions are very complete, made up of 10 pages, but must be read carefully, as it is easy to miss something important. The drawings are much better than average, and are relatively easy to follow in most cases. A separate color and markings guide is presented, with details for two aircraft. Several armament options are provided, including a set of tube rocket launchers which attach to the forward section of the fuselage, two racks with what appear to be 500 pound bombs, and two racks with fuel tanks. It you want the racks only, you’ll have to trim them off, as they are not molded separately. My impression is that this kit is very well engineered. With the P-38, a major problem is the alignment of the wing and fuselage sections, and this is solved and made almost idiot proof by making the wing and cockpit section in two pieces, and the engine and boom sections fit securely into these, making it almost impossible to screw things up. The horizontal tailplane just snaps into place, and that’s the major part of it, and everything lines up perfectly. One thing not mentioned is the fact that considerable weight must be inserted ahead of the center of gravity in order for the airplane to sit level. I used lead shot secured with white glue, and filled both engine sections and part of the nose section behind the guns. It’s heavy, but at least it sits realistically. The cockpit interior can be done straight from the box, and consists of a floor, instrument panel, seat, control wheel (Yes, the P-38 did have a wheel, not a stick), two side panels, a seat brace, a headrest, a very nice clear gun-sight, and a radio array behind the pilot’s seat. All I added were seat belts. The canopy can be built in any of three configurations. You can leave the canopy open, in which condition the little side windows are rolled down and actually not used, while the top section is folded back. You can have the side windows open, in which case you use the one piece unit. Or you can have the canopy closed by gluing the side windows in place before attaching the canopy to the cockpit. The wheel wells should be painted and detailed before they are inserted between the boom halves. They CAN be inserted after the booms are joined, but I wouldn’t recommend it. The landing gear struts are fairly detailed, and consist of several parts, while a long tube (undoubtedly a coolant line to the radiators) runs the length of the main gear wheel wells. The nose gear is likewise well detailed, and easy to install after major assembly is done. The wheels are nicely detailed and appear accurate. The landing gear doors are a little difficult to attach, but should present no real problem for an experienced modeler. The radiators should be painted and mounted inside the booms before the halves are joined, with the covers going on afterwards. The covers were the only ill-fitting part of the kit, and these required some filler to get them to look right. The props and spinners were easy to assembly, but they are the build-up type rather than cast in one piece, so misalignment can result if they are not installed correctly. Remember that the P-38 had opposite rotation propellers, and that the three blades are different for each side. Just be sure that the correct prop goes on each engine or it will look funny to anyone who is conversant with P-38’s. I would have rather seen a one piece propeller. This kit contains a technical innovation that I have only seen on Academy kits. When the parts are molded, there is a shaft that extends through one of the sprues to allow the oil cooler intakes to be hollowed out. That way you don’t have to do it yourself. They did the same thing on the JU-87G kit, hollowing out the 3.7 cm anti-tank gun barrels, and although this isn’t a big thing, it helps, and makes the model more realistic. There are two little holes in the sprue next to the coolers, and they obviously insert in the molding process after the molds are joined together. Good engineering. PAINTING AND FINISHING I chose to do the version with the D-Day stripes, as I have always liked these markings. I started with the white, masking as I went. While I was painting the white, I did the rudder-stabilizer assemblies, which meant that I didn’t have to use the white triangle decal used by this unit as a tactical marking. I just measured the decal and duplicated the form in masking tape. It was easier than trying to get the decal to set down over the navigation lights on the fins. The D-Day stripes are simple on the wings, as long as you measure first so that one stripe is not wider than the others. The fuselage booms are, however, a little tricky, and it requires some effort to get them right. The only salvation is that these markings were hastily painted on the night of 5-6 June 1944, on very short notice, and probably weren’t done very carefully, so any imperfections probably would not detract from the model’s accuracy. The decals, although glossy, seem quite nicely done, and can be applied without trimming as long as the required topcoats are airbrushed on afterwards. Instructions are provided on the three view drawings, although a few markings are given on the main instruction sheets and you have to look for them. RECOMMENDATIONS I would highly recommend this kit. It is accurate, highly detailed, and relatively uncomplicated, especially for a multi-engined aircraft. |
|
|
|
|
|
|
|
|
|
|
|
Information, images, and all other items placed electronically on this site are the intellectual property of IPMS/USA ®. |
|
)
)
)
)
)
)