|
Academy
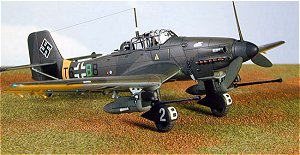
1/72 Ju87G-2 Stuka |
||
|
History of the
aircraft modeled: In the opening days of World War II the Stuka was undoubtedly one of the most feared warplanes in the world. Germany did much to spawn this legend of invincibility about the aircraft. Its ugly appearance had the look of a terribly bird of prey, its spatted undercarriage gave the appearance of outstretched talons. The Stuka's role as a weapon of terror was augmented by the air-driven "Sirens of Jericho" that screamed whenever it was plunged into a dive. The Ju-87 sank more ships than any other aircraft in history, and possibly, destroyed more tanks than any other aircraft the possible exception of the Ilyushin Il-2 Sturmovik. The Stuka was capable of great accuracy with bomb placement, as longs as it went unmolested by fighters. And, due to the excellent quality of the Bf 109 fighter, the Stuka was able in the early stages of the war to maintain an appearance of "invincibility". However, during the Battle of Britain the Stuka's vaunted reputation proved to be hollow. It was too old, too slow, and too vulnerable to modern RAF fighters to be successful as a frontline bomber. The Ju-87s were mauled so severely by the RAF in the Battle of Britain that they were withdrawn from operations over Western Europe. Thus, the Stuka's career shifted to ground attack against personnel and armor. The most famous Stuka
pilot, Hans Ulrich Rudel, destroyed over 500 Soviet tanks in 2,530 combat
missions. But, these successes were not without cost. Rudel was shot down
30 times and in 1945 lost his right leg below the knee. The Ju-87-G “Tank
Destroyer” was Rudel's brainchild. It was basically a cannon-armed version
of the Ju-87D-5. The 37-mm Flak 18 light anti-aircraft gun was revamped to
become the BK 3,7. The BK 3,7, with its magazine and long spent case
ejector chute, was installed in a pod that could be fitted under the wing
of the Ju-87-G immediately outboard of the main landing gear legs on
hardpoints. The type first saw use with the Panzerjagerstaffel (tank
destroyer squadron) on the Eastern Front with great success. |
||
|
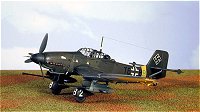
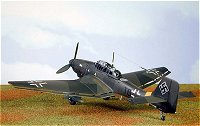
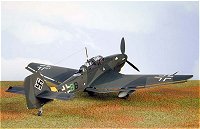
Click images to see full-size photos |
||
|
Building the model: Interior: This comes pretty complete for the scale, although I cannot ascertain the accuracy of it. The sidewall detail is molded into the fuselage halves and is prominent enough. I built all out-of-the-box, except I added some paper harnesses for the pilot and belts for the gunner. I also cut a small piece of thin clear styrene for the gunsight reflector. The cockpit and all its parts were painted Polly Scale RLM 66 Scale Black. Various boxes were brushed in Polly Scale steam Power Black and all received a coat of clear gloss for decal prep, The instrument gauges were first paint Polly Scale Reefer White, with a couple of gauges having their borders done in red and yellow. This was reglossed and the instrument gauges done with Reheat Models Instrument Gauge decals in 1/72 scale. I also used a few Reheat Models Control and Data Placard decals to spruce things up. After all was dry, I shadowed in the side panels and ribbing with a 0.008-in tech pen and India ink. This was lightly cleaned with a damp Q-tip and all received a coat of clear flat. The instrument gauges were all given a drop of Future to finish things up and all was installed, with exception of the rear machine guns. My paper harnesses and belts were attached with thinned Elmer’s glue much like one would a standard decal. The machine guns were painted black and then given a coat of gunmetal. They were set aside and attached in the final assembly. The main fuselage halves and the direction finding antenna piece were joined and fit was very good. I left the clear piece off to the DF antenna and masked its RLM 66 interior. The radiator intake area on the two front fuselage halves was painted Polly Scale RLM 02, as was the intake grille piece. I brushed the grille screens in Polly Scale Graphite, glossed the piece, and gave the screen recesses a wash of India ink. After it dried I sprayed on a coat of clear flat. I made a rear screen for the radiator by scanning a photo and reducing it to scale, then printing it on gloss photo paper. Once the inks had dried, I sprayed this with a coat of clear flat and attached it to the rear of the radiator in the front fuselage halves, which were joined at this time. Exterior: The main wheels were sprayed in steam power black and the tires brushed in Polly Scale Grimy Black. The rear wheel was painted RLM 65 and the tire also painted grimy black. The tires received a moderate wash of dark earth and were attached to their gear spat halves, in which I had already painted the interiors RLM 02. The spat halve fit very well, but caution and slow work is require when sanding the seams and masking the wheels before painting the gear spats. The fit of the spats are so good that one can paint them separate and attach them in the final assembly. The propeller was painted Polly scale RLM 70 Black-Green and set aside. The spinner and back plate were painted black-green. The nose of the spinner was masked and the front painted black. The separate exhausts (thank you very much Academy) were painted steam power black and then Gunze Burnt Iron. The exhausts were finished with a light wash of Pactra Rust and the exhaust ends picked with my tech pen and India ink. The exhausts were set aside for final assembly. I attached the aileron and flap rods before painting, but left the aileron balances and crew step off and painted these separate. They were attached in the final assembly along with the pitot tube, antenna mast, and the horizontal tail supports. The two 37-mm guns were assembled and painted separately from the main assembly. One should hold off attaching parts C9 and C10 until the main assembly is joined. Holes should be predrilled where the instructions call for first, however. I found the cannons very hard to align properly, as the fit of parts C9 and C10 were such that they fit the main gun assembly at a 90° angle, which would make the guns fit 90° to the wing and be incorrect. I had to do a little surgery to the main assemblies (careful, each gun must be done differently), so that after attaching parts C9 and C10, the guns fit so that their feed and ejector chutes were parallel to ground level. This was by far the most annoying part of assembling this kit. Painting and decaling: I used the one-piece canopy, although a four-piece canopy option is also included. No matter, one would only be able to leave the gunner’s station open, as the sliding section to the four-piece is too thick and can only be displayed closed. Anyhow, the canopy was masked with Bare-metal foil (the gun opening was masked from the inside with masking tape) and attached temporarily to the cockpit opening with two-sided scotch tape strips. The main assembly, gun assemblies, horizontal tail supports, and landing gear spats were primed in Polly Scale RLM 65 Light Blue. After some light filling (nothing that couldn’t be done with a brushing of Mr. Surfacer 500) and dry sanding, I reprimed any sanded areas in light blue. Next, I masked the light blue and painted the fuselage identification stripe and outer wing marking on the undersurface were painted Polly Scale Reefer Yellow (I tried RLM 04 on some scrap and found it much too translucent, hence the switch back to reefer yellow, the best darn yellow in acrylics there is). Polly Scale Reefer Yellow and Reefer White (the best acrylic white) can be found in large bottle at your local model railroad shop or ordered online. The fuselage strip was masked before masking the undersufaces and the guns where appropriate. The big guns were paint steam power black and then gunmetal. Lastly I gave the recess in the flares a little India ink. Using my Scanner’s Scan Copy utility, I enlarged the instructions to scale for the fuselage and wings and ran off two copies of each. The main assembly was painted Polly scale RLM 71 Dark Green and after it had dried, I attached masks from masking tape that had been cut using my enlarged instructions as templates to areas to remain dark green. Once finished, I gave the uppers a spraying of Polly scale RLM 70 Black-Green. All masking was removed and the model received two coated of Model Masters Clear Gloss Acryl for decal prep. All decals were from the kit except for the swastika, which I have to get from a spares sheet. I would like to say that the decals were as good as those I just used on Academy’s 1/72 hawker typhoon, but sadly, they were not. After noticing that these decals were of the tick unrelenting to solvent school, I put a drop of Elmer’s in my decal water. This helps the decal to lie down without silvering, but no solvent I have would have them lie in the recesses. It was off for a new #11 and I cut all the decals wherever there was a recess, long, tedious, and not much fun. I then applied a little Elmer’s to the recesses and carefully press the decal with a damp warm cloth, again, slow, tedious work. But I finally got them all to my liking. I still had to touch up the ‘B’s on the landing gear spats, as I has to make multiple cut for the decal to lie down. Please Academy, stick to whoever made those wonderful Typhoon decals. After the decals had dried and I had completed any touch up, I gave them a sealant coat of clear gloss. It was then time for the shadowing of control surfaces and all access recesses. This was done with my 0.008-in tech pen and India ink mainly. When dry, I gave all a couple coats of Polly Scale Clear Flat. Exhausts stains were done using powdered black and gray pastels. I also did a little dry brushing with dark earth behind the main gear and rear wheel. Masking was removed from the canopy and the clear areas received a brushing of Future. The canopy was attached with Micro Krystal Kleer. When dry, I touched up the gloss Krystal Kleer joins with a brushing of the appropriate dark green or black-green paint. The guns, exhausts, pitot, antenna mast, DF antenna clear covering, aileron balances, and step were attached and any glue areas exposed touched up with the appropriate paint. And there you have it, a very nice 1/72 scale tank buster. Due to the number of tiny little accouterments, I would recommend that a modeler with a little knowledge of handling and dealing with such be nearby should a novice try to assemble it. The fit, though very good, requires that one have a little experience in aligning things. |
||
|
Information, images, and all other items placed electronically on this site are the intellectual property of IPMS/USA ®. |
||


