|
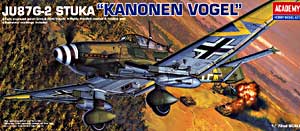
Academy 1/72 Ju-87G-2 Stuka |
|
|
Kit Number 12404 |
|
|
Reviewed By Chad Richmond, #10324 |
|
|
|
|
|
MSRP: $14.00 USD The JU-87 Stuka was first flown in 1935, and was still in use at the end of World War II. Even though it was one of the slower aircraft, and almost completely vulnerable to any armed opponent, it still was the best tank killer on the battlefield. Hans-Ulrich Rudel became the most decorated Luftwaffe pilot of World War II flying the Stuka throughout his career. This kit is of the extended wing tip late production G-2 with the under wing 37mm cannons. Molded in light gray plastic, the kit has all the appearances of a scaled down Hasegawa 1/48th release of the G-2. Curiously, the date stamped in all of the trees was 2002, even though the release of this model was June, 2005. Unfortunately, there is only one set of markings for the model, and that is Rudel’s. Construction throughout the kit was really easy. Everything fit the way it was supposed to, except for the wheel strut fairing to wing junction and the stabilizer strut mounting point to the fuselage. Both cases required a lot of trimming and shaping. These were the only places that required any putty. The wing tip extensions need some sanding and feathering to make the molding seam disappear. The flap actuators and counter balances are a little out of scale, but, this is 1/72nd and they are made of plastic, so they are just fine. I lost two counter balances and the fuselage step during handling and painting, and had to rob another kit. They are fragile and do have a tendency to disappear, especially during masking. The wing to fuselage fit is perfect and only requires a quick swipe of Tenax to put it in place. The under wing cannon pods also fit well, but you have to pay attention to be sure they are mounted to the wing properly. The gun pods are supposed to be perpendicular to the ground, not the wing, and it’s really easy to put them on wrong. The cockpit is very nicely detailed, something rare for this scale. The only thing missing is some seat belts. What was disappointing, however, was the canopy. You are provided with very clear and crisply molded parts for both open and closed canopies. After completing the model, I tried everything I knew how to do to be able to display the canopy open. I never figured out a way to do it, even with a lot of thinning on the canopy parts. It was a real shame, because the interior of the cockpit really looked nice after a wash and some subtle dry brushing. The one piece canopy fit pretty well, except around the windscreen. After masking the canopy using Scotch clear tape, I glued the canopy in place and started the tedious task of laying out the splinter camouflage. To do this, I took the kit marking drawing and blew them up to the exact size of the model and then cut out each pattern and transferred it to Tamiya’s masking tape. This is a tedious task, but I was really happy at how it came out. I used Gunze Sanyo acrylics for all three camouflage colors, RLM 70/71/65. I used Model Master Chrome Yellow for the wing tips and fuselage stripe. It was the closest I could come to the decal yellow. I sprayed the entire model with Tamiya clear before applying the decals. Now came the only time I really had any disappointment with the kit, other that the open cockpit. The majority of the decals are too large, and there are no swastikas. I got the swastikas from my decal box, but they are probably just a slight bit large. As I started applying Rudel’s markings, I rapidly ran out of room, trying to arrange everything as the drawings showed. Also, every one of the markings decals broke, some before I even got them off of the sheet. This was also true of the spinner spiral. It broke into four pieces trying to get it off the sheet. I managed to find an FW-190D-9 spinner spiral that came close enough to look passable. The decals that were one color laid down extremely well, but the multi colored decals were hard to get to settle into panel lines and conform to contours, The three part yellow “V” for the left wing was a real task. I ended up using white glue to join the pieces at the leading edge. This was another area where size of markings came into play. The wing cross and “V” won’t fit into the designated space without some overlap. I used the MicroScale decal solutions in applying all decals, and it took several applications of Solvaset to get them to lay down satisfactorily. Despite the canopy and the decals, I really like this model, and once I can find some decals, would like to build at least one or two more. I realize the canopy problem is not insurmountable, but being an out-of-the-box builder, it does cause me frustration. I would however recommend it to anyone. Thanks to Bob Lewen of Academy for the sample kit and to John Noack for allowing me to build it. |
|
|
|
|
|
|
|
|
Information, images, and all other items placed electronically on this site are the intellectual property of IPMS/USA ®. |
|
)
)
)