|
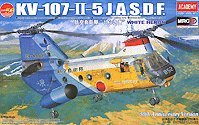
Academy 1/48 Kawasaki KV-107-II-5 "White Heron" |
|
|
Kit Number 12205 |
|
|
Reviewed By Paul Bradley, #35554 |
|
|
|
|
|
MSRP: $52.00 USD The Kawasaki KV-107 is the Japanese license-built version of the basic Boeing-Vertol BV-107 helicopter. Built in some numbers for the Japanese Self Defence forces, the KV-107 family is still in limited service today. A specialized Air Sea Rescue version was built in small numbers, and was retired in 2004. This kit features that variant with both standard markings and special markings to commemorate the 50th anniversary of the Self Defense Forces. As this kit is a “limited edition” I decided that I had to build the commemorative machine. |
|
|
|
|
| This kit is the second in Academy’s series based on the BV-107. Dave Morrissette has already given us a comprehensive look at the CH-46E version of this basic set of molds, so I will refer you to his review for more in-depth coverage. Sufficient for me to state that I was pleased by the overall level of detail, though I thought the pilots’ seats are a bit lacking, especially as no seat belts are included. I was impressed with the instrument panel and its associated decal, which snuggled down nicely over the detail to give a nice alternative to painting all those dials and switches! One area where the kit is a letdown is the sheer number of ejector pin marks on the interior pieces – these are pain to clean up. | |
|
|
|
|
Arriving in an impressively large box with striking artwork, this kit contains the same basic sprues, with the addition of a new set
featuring the parts exclusive to this variant. High on the list of new parts are the enlarged side sponsons and smaller tail
unit for the KV-107. There are also parts for the rescue winch assembly and for the searchlight housings on both fuselage
sides. Most spectacular is the colorful new decal sheet, giving options for the commemorative machine as well as a standard
machine. Also included are sufficient numerals to complete any of the standard machines. The instruction booklet is
comprehensive and includes callouts for painting all parts in the kit, a good feature. Construction was fairly easy, though getting all the interior fuselage pieces lined up and properly placed was a bit of a challenge. There is a lack of positive indicators as to where the bulkheads and floor should attach to the sidewalls, and some “educated guestimates” are required. Although I didn’t have the same problems Dave did, I did find that I had some trouble getting the forward fuselage to close around the floor/bulkheads. Some judicial trimming and sanding eased, but didn’t entirely eliminate, the problem. Suffice to say that care will need to be taken getting the fuselage construction just right…. |
|
|
|
|
| For the interior, one has the option to equip the machine with either bench seats or stretchers. I chose to equip mine with benches on one side and stretchers on the other, figuring that a rescue machine might require both (And it looks cool!). Being a search and rescue machine, there are the requisite bubble windows and these are nicely molded by Academy. Instead of painting mine, I added some food color to Future and dipped mine to the proper level. The instructions call for clear blue, but photos of the real thing clearly show that the tint is green. | |
|
|
|
| Once the fuselage was assembled, I noticed that the rear interior roof was devoid of detail, in fact showed all the seams in this area. As there is no part supplied to cover this area, I created a new roof area with square section and sheet stock plastic card. Painted the same color as the interior, it blends in rather well. | |
|
|
|
|
The new sponsons go together pretty well, though the fuel dump pieces need some careful filing and filling to blend them in. I
had a little trouble with the join to the underside of the fuselage, but I feel that this was mainly my fault and not that of the
kit. Pay attention here though, as it could be very easy to mess up this area and it will be very obvious. Once the fuselage and sponsons were complete and wedded, it was time to think about painting the beast. The basic scheme is white over chrome yellow with red areas and dayglo sponsons sides. Added to this for the commemorative scheme are large swatches of light and dark blue, with areas of black. Which all adds up to a pretty thorough masking job! For this I used my old standby of Post-It notes, which I find are low tack and great for the mainly straight lines of this project. As I stated earlier, I decided to build the commemorative machine as that is the raison d’etre of this kit, even though it is a pretty daunting scheme. It took me the best part of a month to get this paint job done though, as I laid down multiple layers of white, yellow, blue and red to get even colors. My poor airbrush is now on a well-earned vacation. The color call outs are for Gunze paints. I used Gunze 322 for the Dark Blue, which I also lightened for the Light Blue (as I could not find a jar of the recommended 323), and these seem to match fairly well with photos of the real thing. Note that Academy’s box art has colors that are too light, so don’t use them as a guide! There are quite a few photos of this machine on the web, and I suggest a quick Google search to find some is most worthwhile. The decals are outstanding – thin, sharp, registered and easy to use. I used the Microscale system, which worked well, though I did find that some of the longer decals had a tendency to try to curl up on themselves as they are so thin, so care is required at this stage. There are spares of the most important decals, a nice touch! Overall, my impressions of this kit are positive – it is certainly a colorful and unusual subject. The breakdown of the parts seems to suggest that the Canadian Labrador, a Swedish machine and other variants will be released at some future stage. This is a nice kit, but certainly not one for the beginner, what with the awkward fuselage fit and the paint scheme. Otherwise, I can highly recommend it. Be aware that Academy states this is a limited release, so if you fancy one, better get one now! My sincere thanks to Academy for supplying the review sample. |
|
) |
) |
|
|
|
|
Information, images, and all other items placed electronically on this site are the intellectual property of IPMS/USA ®. |
|
)
)
)
)
)
)
)